
A broken valve stem on your vehicle’s tire means you cannot directly insert an air hose or pump to inflate it. This situation often arises from impacts, manufacturing flaws, or wear over time. The good news is that you can typically repair the valve stem to allow proper inflation. This guide will walk you through the process using a tire repair kit, explain the tools needed, and provide safety advice to ensure your tire is safe for driving.
Underinflation can cause the tire to overheat, reducing fuel efficiency by up to 10 percent, and increasing the risk of hydroplaning or loss of traction. Proper inflation is crucial for the longevity of your tires and the safety of your vehicle. When the valve stem is broken, immediate action is required to restore the correct air pressure.
Key takeaways
- Repair the broken valve stem using a tire plug kit for a long-term solution.
- Inflate the tire with an air compressor or inflator after repair.
- Inspect the tire for additional damage before driving.
- Replace the tire if the repair is not possible or if the tire is severely damaged.
Understanding the Problem
Valve stems are essential for maintaining tire pressure. They consist of a metal body with a rubber seal. When the stem breaks, it can leave a hole in the tire’s rim area where the valve attaches. Without a stem, air cannot be added or removed from the tire. This can lead to underinflation, which affects fuel efficiency, handling, and safety.
Common causes include:
- Road hazards like potholes or curbs hitting the valve stem.
- Corrosion from road salt or moisture.
- Manufacturing defects in the valve stem.
- Improper installation during tire changes.
Tools and Materials Needed
To repair a broken valve stem, you’ll need the following:
- Tire repair kit with rubber plugs and adhesive.
- Valve stem remover tool (optional but helpful).
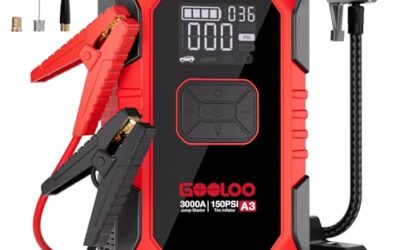
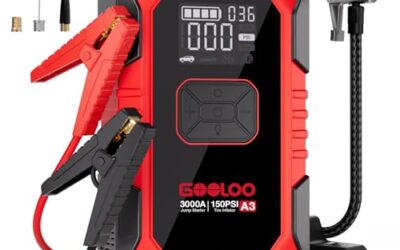
- Air compressor or portable tire inflator.
- Soap solution for leak testing.
- Gloves and safety glasses.
- Jack and spare tire if needed.
These items are available at auto parts stores and are relatively inexpensive. Consider having a tire pressure gauge on hand as well, as it is essential for verifying the final pressure.
Step-by-Step Guide to Repairing the Valve Stem
Step 1: Prepare the Work Area
Safety first. Park your vehicle on a flat, level surface. Engage the parking brake and use wheel chocks if available. Loosen the lug nuts on the affected wheel to make it easier to remove later if necessary. This step prevents the wheel from spinning and reduces the risk of injury.
Step 2: Remove the Wheel
If the valve stem is severely damaged or the tire is flat, it may be necessary to remove the wheel. Use a lug wrench or impact gun to remove the lug nuts. Then, use a tire iron or hydraulic jack to lift the vehicle and remove the wheel. Be careful not to damage the rim. Removing the wheel gives you better access to the repair area.
Step 3: Inspect the Valve Stem Area
Look at the rim where the valve stem attaches. Check for cracks or other damage. The valve stem usually threads into a hole in the rim. If it’s broken off, the hole may be visible. Inspect the surrounding area for any embedded debris that could affect the seal.
Step 4: Clean the Area
Use a wire brush or emery cloth to clean the hole and surrounding area. Remove any dirt, rust, or debris. This ensures a good seal for the plug. A clean surface is critical for the plug to adhere properly and prevent future leaks.
Step 5: Select and Prepare the Plug
Choose a rubber plug that matches the size of the hole. Most kits come with various sizes. Lubricate the plug with soapy water or the kit’s adhesive if provided. Using the correct size plug guarantees a tight fit and effective repair.
Step 6: Insert the Plug
Insert the plug into the hole from the inside of the rim. Use a plug insertion tool if available, or your fingers. Push it in until it’s flush with the rim surface. Inserting the plug from the inside side helps it stay in place during inflation.
Step 7: Seal the Plug
Some kits include a sealant or cement. Apply it around the plug to ensure it doesn’t come out. For permanent repairs, some use a special tool to flare the plug. Sealing the plug prevents air from escaping and maintains the repair’s integrity over time.
Step 8: Reinstall the Wheel
Install the wheel back onto the vehicle. Tighten the lug nuts in a star pattern to the recommended torque. This is important for safety. Proper torque distribution prevents warping of the wheel and ensures even pressure distribution.
Step 9: Install a New Valve Stem
Once the plug is in place, install a new valve stem into the hole. Many repair kits include a new valve stem. Screw it in by hand, then tighten with a wrench. Do not overtighten to avoid damaging the threads. A new valve stem provides a reliable interface for the air hose or compressor.
Step 10: Test for Leaks
Apply a soapy water solution to the valve stem and plug area. If bubbles appear, there’s a leak. Add more air or repeat the repair if necessary. Testing for leaks confirms the repair is successful before driving the vehicle.
Inflating the Tire
After the valve stem is repaired and reinstalled, you can inflate the tire using an air compressor or a portable tire inflator. Connect the inflator to the new valve stem. Set the desired PSI (usually 30-35 for passenger cars, check your owner’s manual). Run the compressor until the tire reaches the correct pressure. Do not overinflate. Overinflation can lead to tire damage and reduced handling.
Always use a tire pressure gauge to verify the pressure after inflating. Recheck after driving a short distance as pressure can change with temperature. Maintaining the correct pressure is key to tire performance and safety.
Alternative Methods
If a plug kit is not available, there are temporary options:
- Sealant: Some tire repair kits include a liquid sealant that can be injected into the tire. This can help seal small punctures but may not work well with a broken stem. It’s best for punctures, not stem issues. Sealant can provide a quick fix but is not as durable as a plug.
- Borrowing a Valve Stem: If you have another tire with a good stem, you could remove it and install it on the damaged one. However, this is not recommended as it may not fit perfectly and could cause leaks. This method is only a short-term solution.
- Riding on the Tire: As a last resort, you can drive on a slightly underinflated tire for a short distance, but this is dangerous and not advised for long periods. Underinflation increases the risk of tire failure.
These alternatives are not ideal and should only be used temporarily until a proper repair can be made. They are not substitutes for a proper repair.
Safety Considerations
Inflating a tire with a broken valve stem requires care to avoid accidents. Never drive on a severely underinflated tire as it can lead to tire failure, loss of control, or blowout. Always ensure the tire is properly repaired before driving. If the damage is extensive, such as a cracked rim, consider replacing the tire and wheel assembly. Driving with improper tire pressure can also affect the performance of electronic stability control systems.
Follow all safety guidelines from your vehicle manual and local laws regarding tire maintenance. Regular inspections can help prevent such issues from occurring in the first place.
Common Mistakes
- Assuming the tire is still drivable without repair.
- Using the wrong size plug for the hole.
- Not cleaning the area thoroughly before inserting the plug.
- Ignoring the torque specs when reinstalling the wheel.
- Overinflating the tire after repair.
These mistakes can lead to further damage or unsafe driving conditions. Always double-check your work and follow best practices to avoid costly mistakes. For example, using too much sealant can clog the valve stem and make inflation difficult.
When to Get Professional Help
If you are not comfortable with the repair process or if the damage is beyond basic repair, take your vehicle to a professional tire shop. They have the tools and expertise to handle complex repairs or replacements. Additionally, if the tire shows signs of separation or the rim is damaged, professional inspection is necessary. Professional help ensures the repair is done correctly and the vehicle is safe to drive.
Considerations for Vehicles With TPMS
Many modern vehicles are equipped with Tire Pressure Monitoring Systems (TPMS). If your tire has a TPMS sensor, the sensor is usually mounted on the valve stem. If the valve stem is broken, the sensor may be damaged or lost. In such cases, you may need to replace the entire tire assembly to maintain the TPMS functionality. Consult your vehicle’s manual for specific instructions on resetting the TPMS after a repair or replacement.
Comparison of Repair Methods
| Method | Pros | Cons | Cost | Duration |
|---|---|---|---|---|
| Tire Plug Kit | Permanent, effective | Requires skill | $10-20 | 30-60 min |
| Sealant | Quick, no removal | Temporary, may not seal stem | $15 | 10 min |
| Professional Repair | Expert, reliable | Costly | $50+ | 1-2 hours |
Choosing the right method depends on the severity of the damage and your resources. A plug kit offers the best long-term solution for most situations.