
To check tire pressure after a long drive, park safely, use a reliable gauge, and record each tire’s reading without treating it as a cold-pressure measurement. Driving warms tires and usually raises their pressure, so use your vehicle’s instructions for hot tires or recheck when tires are cold before adjusting to the door-placard pressure.
- Use the pressure listed on the driver-door placard or in your owner’s manual, not the tire sidewall’s maximum pressure.
- Hot readings are useful for spotting a tire that is unusually low, but they are not directly comparable to a cold specification.
- Do not release air from a hot tire just to make its reading match the cold placard value.
- If a tire looks damaged, very low, or unsafe, stop in a safe place and follow the vehicle manual’s guidance.
What changes after a long drive?
Air pressure usually rises as a tire warms during driving. The amount varies with conditions such as driving, weather, load, and tire temperature. There is no single hot-pressure increase that applies to every vehicle and trip.
Your vehicle’s recommended pressure normally refers to cold tires. In this context, cold means the vehicle has been parked for several hours and the tires have not been warmed by driving or direct sun. Check your owner’s manual or door placard for the vehicle’s specified pressure and any instructions for a warm tire.
A hot reading still tells you what the gauge measures at that moment. It can help reveal a tire that is much lower than the others, but equal readings do not prove that all tires are correctly inflated. Tire position, load, temperature, and recent driving can affect readings.
- Choose a safe place to park. Move away from traffic and stop on a stable, level surface when possible. Do not stand in a traffic lane or beside fast-moving vehicles to reach a valve stem.
- Check for obvious trouble first. Look for a visibly flat tire, a bulge, a cut, exposed cords, or an object lodged in the tread. Do not remove an embedded object. If the tire appears unsafe, do not keep driving to find a gauge or air pump.
- Find the vehicle’s pressure reference. Read the tire-pressure placard, often on the driver-side door jamb, or check the owner’s manual. Note separate front and rear pressures if listed. A loaded vehicle or a spare tire may have different instructions.
- Use a suitable gauge. Remove the valve-stem cap and press the gauge squarely onto the valve. A brief hiss can happen as the gauge connects, but a poor seal can release air and give an unreliable reading. Read the gauge, then replace the cap.
- Check every tire. Include the spare if it is accessible and the vehicle manual provides a pressure check procedure. Record each value and mark that the tires are hot. A gauge with memory can help keep readings organized; see our explanation of what digital tire-pressure gauges with memory store.
- Compare readings carefully. Note a tire that is markedly lower than its companions, but do not treat a small difference between hot tires as proof of a leak or a fault. Gauge accuracy and changing tire temperatures can affect comparisons.
- Decide whether to add air or recheck cold. If no safety concern is present, let the tires cool and measure again before setting them to the cold placard pressure. If a tire is very low, visibly damaged, or losing pressure, follow the manual’s instructions and arrange help rather than relying on a generic hot-pressure target.
Should you add air to hot tires?
There is no universal hot-tire pressure target. If your owner’s manual gives instructions for checking or inflating warm tires, follow those instructions. Otherwise, the clearest way to set pressure is to check tires cold and use the vehicle’s specified value.
If a hot tire reads below the cold placard value, do not assume it is safe or that adding air is always the right response. The reading alone cannot tell you why pressure is low or how much pressure to add while the tire is warm. Check for visible damage and consult the vehicle manual. If the tire appears unsafe, stop driving and seek roadside assistance or a tire professional.
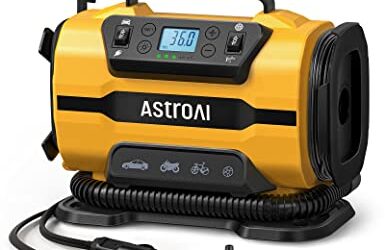
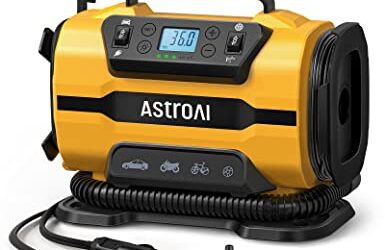
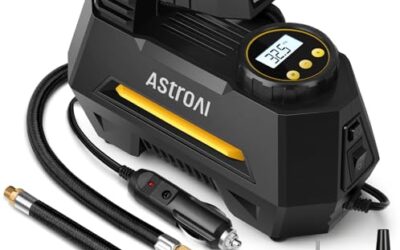
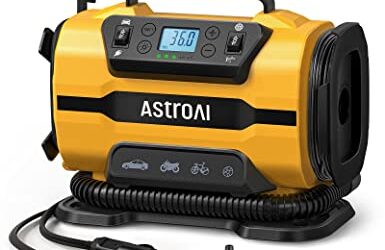
If you add air because the vehicle instructions call for it, use a gauge to check the result. An inflator’s displayed reading may not match a separate gauge exactly. The inflator’s connection, gauge accuracy, and the tire’s temperature all affect the result. For an inflator with automatic shutoff, the setpoint still needs to match the applicable vehicle guidance. Our guide to a 12-volt tire inflator with automatic shutoff explains what that feature does and does not control.
How to set pressure after the tires cool
When the vehicle has been parked long enough for the tires to return to ambient temperature, check each tire again. Use the vehicle placard or owner’s manual for the correct front and rear values. Do not substitute the maximum pressure molded on the tire sidewall; that marking is not the vehicle’s recommended operating pressure.
Add air in small amounts and recheck with a gauge until the tire reaches its specified pressure. If pressure is too high while the tire is cold, release a small amount and measure again. Replace valve caps after checking. If the same tire repeatedly loses pressure, have it inspected for a puncture, valve problem, wheel damage, or another cause.
Temperature changes can affect pressure even when the vehicle has not been driven. Check pressure when the tires are cold after a major weather change, and follow the maintenance schedule in the owner’s manual. For winter-specific gauge and temperature considerations, read our cold-weather tire pressure gauge guide.
What TPMS can and cannot tell you
A tire-pressure monitoring system (TPMS) can warn you when pressure falls to a level that triggers the system. It does not replace a manual pressure check. Some systems display individual tire pressures; others show a warning without giving a number. Display details vary by vehicle model year and system.
A TPMS warning may not appear as soon as a tire begins losing air. If the warning remains on, returns, or appears with a visibly low tire, stop safely and check the tire. Use the owner’s manual for the warning’s meaning and any required reset steps. A reset does not fix a leak or make an underinflated tire safe.
After you set pressure, some vehicles need time or a specific procedure to update the TPMS display. The process varies by make, model, and model year. Follow the vehicle manual rather than assuming every system refreshes in the same way.
Common mistakes
- Bleeding air from hot tires to match the cold placard number. The placard value applies to cold tires unless the vehicle instructions say otherwise. Recheck after cooling instead.
- Using the sidewall maximum as the target. Use the vehicle’s specified pressure for the tire size and vehicle configuration.
- Checking only one tire. Each tire can have a different pressure, and front and rear recommendations can differ.
- Assuming TPMS warning means pressure is close enough. A warning system is not a substitute for measuring pressure with a gauge.
- Trusting one inconsistent reading. Reseat the gauge and measure again. If readings keep varying, try a different gauge or have a tire shop check pressure.
- Ignoring a repeat pressure loss. Adding air may not address a puncture, leaking valve, or wheel issue. Recurring loss needs inspection.
When to get professional help
Stop and seek help if a tire is visibly flat, bulging, cut, or damaged, or if the vehicle feels unstable. Do not drive on a tire that may be unsafe. Follow the vehicle manual for spare-tire use and roadside procedures; spare types and limits vary.
Arrange a tire inspection if one tire repeatedly loses pressure, a TPMS warning returns after correct inflation, or a gauge reading remains inconsistent. A tire professional can inspect the tire, valve, and wheel. For dual-rear-wheel trucks, valve access and gauge fit can complicate checks; our guide to gauges for dually trucks covers those access issues.
Gear that can help
If you need tire inflators or tire pressure gauges for this job, these picks already appear in our tire inflators guides. Check the full guide for fit and who should skip each one.
Pros
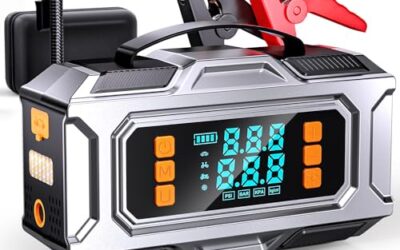
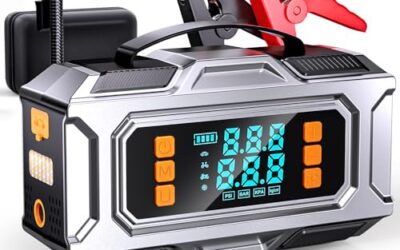
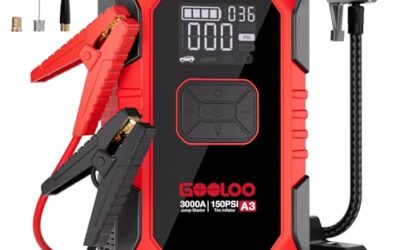
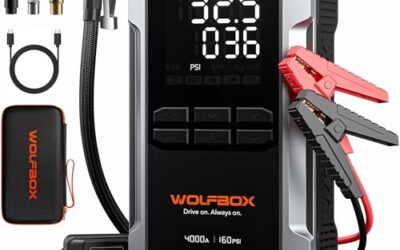
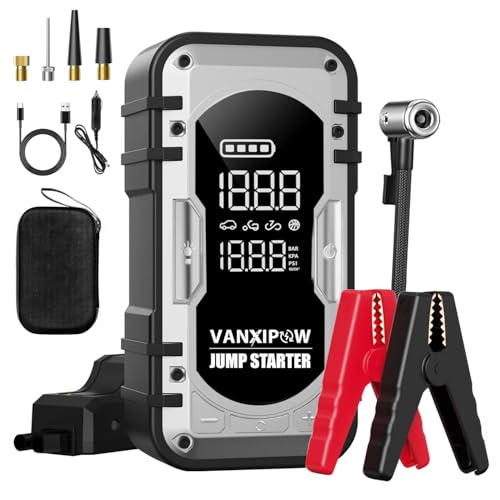
- Combines jump-starting, tire inflation, emergency lighting, and USB charging in one device
- Listed compatibility covers a broad range of 12V vehicles and engines up to 9.0L gas or 8.0L diesel
- Stated weight of 615 grams supports portable use
- LCD screen displays battery level, inflation mode, and real-time tire pressure
Cons
- The air pump should not be used continuously and requires cooling when it becomes seriously hot
- The product has one USB output port
Specifications
| Color | black silver |
|---|---|
| Dimensions | 6.9 x 2.3 x 3.5 Inches |
| Weight | 1.873929227 pounds |
| Product Group | Automotive Parts and Accessories |
Best For / Avoid If
Best for buyers prioritizing
- Combines jump-starting, tire inflation, emergency lighting, and USB charging in one device
- Listed compatibility covers a broad range of 12V vehicles and engines up to 9.0L gas or 8.0L diesel
- Stated weight of 615 grams supports portable use
Consider another option if
- The air pump should not be used continuously and requires cooling when it becomes seriously hot
- The product has one USB output port

Specifications
| Color | Yellow |
|---|---|
| Size | Large |
| Dimensions | 8.27 x 3.74 x 6.69 Inches |
| Weight | 650 Grams |
| Product Group | Automotive Parts and Accessories |
| Binding | Tools & Home Improvement |

Pros
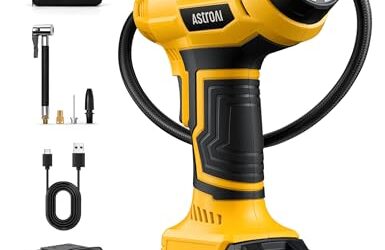
- 0-75 PSI measurement range
- ANSI B40.1 Grade A calibration specification
- Glow dial and 360-degree swivel chuck support low-light and angled use
- Listed for multiple vehicle and bike types
Cons
- Measurement range ends at 75 PSI
- Product binding is listed as Unknown Binding
Specifications
| Color | Black |
|---|---|
| Dimensions | 4.7637795227 x 2.8346456664 x 1.3779527545 inches |
| Weight | 0.6283174467 pounds |
| Product Group | Automotive Parts and Accessories |
| Binding | Unknown Binding |
Best For / Avoid If
Best for buyers prioritizing
- 0-75 PSI measurement range
- ANSI B40.1 Grade A calibration specification
- Glow dial and 360-degree swivel chuck support low-light and angled use
Consider another option if
- Measurement range ends at 75 PSI
- Product binding is listed as Unknown Binding
FAQ
How long should I wait after driving to check cold pressure?
Check when the vehicle has been parked for several hours and the tires have not been warmed by driving or direct sun. Your owner’s manual may give more specific guidance.
Can I check tire pressure immediately after a long drive?
Yes. A gauge can measure the pressure while tires are hot. Record the readings as hot measurements, and do not compare them as if they were cold readings.
Should hot tires have the same pressure as cold tires?
Not necessarily. Pressure usually rises as tires warm. Use the vehicle’s hot-tire instructions if supplied; otherwise, set pressure when tires are cold to the vehicle specification.
Does the pressure on the tire sidewall tell me what to inflate to?
No. The sidewall marking is not the vehicle’s recommended operating pressure. Use the door placard or owner’s manual.
Sources and further reading
- Tire Safety (NHTSA): Guidance on tire safety, inflation, and tire-pressure monitoring systems.
- Keeping Your Vehicle in Shape (fueleconomy.gov): Vehicle maintenance guidance, including tire pressure checks.