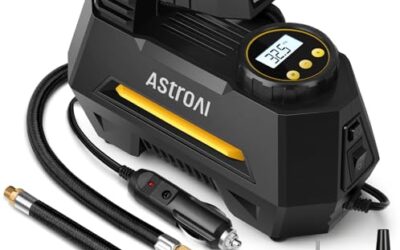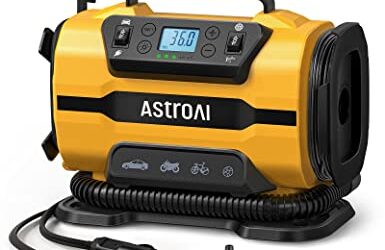

To check tire inflator hose for leaks, pressurize the hose only as its manual allows, then apply soapy water to its joints and suspect areas. Growing bubbles point to escaping air; first disconnect power and release pressure before inspecting or handling damaged parts.
- Check the hose, couplers, gauge connection, and tire-valve connection separately.
- Use soapy water to locate escaping air, not to measure tire pressure.
- Keep hands clear of a pressurized hose and stop if hose or fittings look damaged.
- Inflator designs vary, so follow the unit’s instructions for connection, pressure, and repair.
What you need before testing
Gather soapy water in a spray bottle or use a small amount of dish soap mixed with water. A clean cloth helps remove residue afterward. You may also need the inflator manual, especially if the hose cannot be separated from the pump or has a built-in pressure gauge.
Park away from traffic on a stable surface. Keep the inflator away from water except for the small amount used on the outside of hose connections. Do not spray the motor, battery, electrical connectors, or control panel. If the inflator uses a vehicle power outlet, keep its plug and cable dry.
Do not exceed the hose, fitting, or inflator pressure rating. If you cannot find operating instructions or determine how to pressurize the hose safely, skip the pressure test and ask the maker or a qualified repair shop. Never loosen a fitting or cut a hose while the system is pressurized.
How to check tire inflator hose for leaks
- Inspect with the inflator off. Unplug it or disconnect its battery as the manual directs. Let hot parts cool. Look along the hose for cracks, cuts, bulges, melted spots, kinks, or areas that have become unusually stiff or soft. Check both ends for loose, bent, corroded, or visibly damaged fittings.
- Check the connections. Look where the hose joins the compressor, gauge, chuck, or screw-on tire connector. On some inflators, hose connections are fixed and not intended for user removal. Do not force a fitting or tighten it beyond the manual’s instructions.
- Connect the hose as instructed. Attach the hose to the inflator and, if needed, a tire valve. Keep the chuck or connector seated correctly. A poorly attached connector can leak during the test and make an intact hose seem faulty.
- Pressurize only as directed. Follow the inflator manual for its operating sequence and pressure limits. Some units run only while switched on; others may hold pressure in a hose after shutdown. Do not improvise by blocking the hose end or adding pressure with another compressor.
- Apply soapy water. Coat the outside of hose surfaces and connection points with a light film. Test one area at a time. Avoid spraying electrical parts or allowing liquid into the pump, valve core, or connector opening.
- Watch for bubbles. A few bubbles created while applying the solution may be harmless. A stream of new bubbles that forms or grows at one spot suggests air is escaping there. Give each area a short look, then wipe it clean and move on.
- Depressurize before handling. Switch off and disconnect power, then release pressure using the method in the manual. Disconnect from the tire valve as directed. Do not pull apart a pressurized coupling or put fingers over an open hose end.
- Repeat if the result is unclear. Dry the area, reconnect safely, and test again. If bubbles appear only at the tire connection, reseat the chuck and repeat before deciding that the hose itself leaks.
Where to test and what bubbles mean
| Test area | What a leak may look like | What to check next |
|---|---|---|
| Hose surface | New bubbles repeatedly forming on a crack, cut, or damaged patch | Stop using a visibly damaged hose. Ask whether the hose is replaceable for that inflator. |
| Hose-to-pump joint | Bubbles growing around the fitting while the hose is pressurized | Check the connection only after depressurizing. Follow the manual for service or replacement. |
| Chuck or tire connector | Bubbles at the contact point with the tire valve | Reseat the connector and test again. Check whether the valve stem or connector seal may be leaking. |
| Gauge or inline fitting | Bubbles around a threaded or joined section | Do not disassemble a sealed assembly unless the maker allows it. Seek service if the leak returns. |
| Valve stem | Bubbles at the valve core or stem, rather than along the hose | The tire or valve may be the source. A tire shop can inspect it and determine whether repair is appropriate. |
Soapy water shows where air escapes; it does not identify the failed part with certainty. Air can travel along a fitting and bubble at a nearby edge. Clean and retest the exact area to narrow the location, then inspect the hose and connection with the system depressurized.
Tell hose leaks from other pressure loss
A tire that loses pressure after inflation does not prove the inflator hose leaks. Air may escape from the tire valve, a puncture, a bead leak, or a connector that did not seal during inflation. The hose may also leak only while the compressor runs, or only when bent into a particular position.
Separate the checks. First, use soapy water on the hose and its joints while following the inflator’s instructions. Then check the tire valve and accessible tread or sidewall areas for bubbles. Do not rely on a dashboard tire-pressure warning to pinpoint the source; the warning system reports pressure concerns, not which component leaked.
For a pressure comparison, use a separate tire gauge and the vehicle’s recommended cold pressure, typically shown on the driver-door label or in the owner manual. The tire sidewall marking is not the vehicle’s inflation target. A gauge can help show whether pressure changes, but it cannot identify the leak location by itself. See our explanation of what a tire pressure gauge with memory stores for context on pressure readings.
If tire pressure drops, do not assume the tire is safe to drive. Follow the vehicle and tire maker’s instructions, and get help if the tire looks damaged, loses air quickly, or cannot hold its specified pressure. NHTSA’s tire safety guidance covers tire condition and inflation basics.
Common mistakes
- Testing only the hose wall. Leaks often occur at a joint, chuck, or valve connection. Check each accessible section.
- Calling initial foam a leak. Bubbles left by spraying can resemble a leak. Look for new bubbles that repeatedly grow at the same spot.
- Overtightening a fitting. Excess force can damage threads, seals, or plastic housings. Use only the method in the manual.
- Testing with excessive pressure. More pressure does not make the test more useful and can damage equipment or create a hazard. Stay within the inflator’s instructions.
- Using tape or glue as a permanent fix. A patch may fail under pressure, heat, or movement. Use only a repair method approved for that hose and model.
- Ignoring a leaking valve connection. A connector that is crooked or worn can mimic a hose failure. Reseat it, then repeat the test.
- Checking pressure with the inflator’s display alone. Built-in gauges can differ in design and use. A separate gauge can help compare readings; vehicle-specific pressure guidance still applies.
When to get professional help
Stop using the inflator if the hose has a split, bulge, exposed reinforcement, heat damage, or a fitting that moves or will not seal. Also stop if air escapes near electrical parts, the unit makes an unusual sound, or it becomes unusually hot. Disconnect power only if you can do so safely, and follow the manual for any remaining pressure.
Ask the inflator maker or a repair shop whether the hose can be replaced and which part fits the exact model. Hose diameter, fitting type, pressure rating, and connection design vary. A replacement that looks similar may not be rated or compatible with the unit.
Get tire service if bubbles appear at the tire valve or tire, pressure continues to fall, or the tire has visible damage. Do not remove a valve core or attempt an internal tire repair without the proper tools and training. If you need a different inflator for routine use, our guide to 12V inflators with automatic shutoff explains considerations for daily drivers.
Gear that can help
If you need tire inflators or tire pressure gauges for this job, these picks already appear in our tire inflators guides. Check the full guide for fit and who should skip each one.
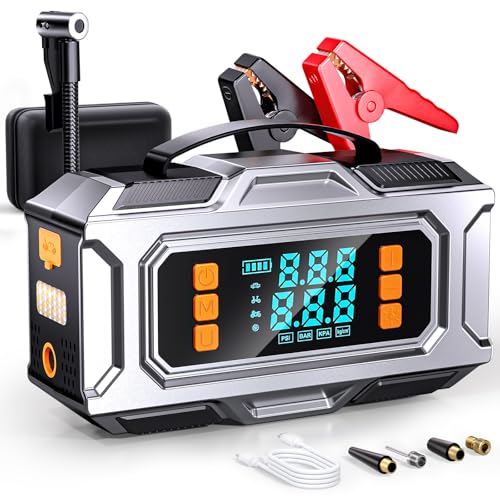
Pros
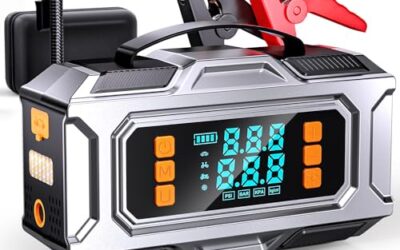
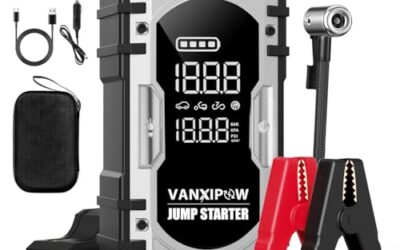
- Combines jump starting, tire inflation, device charging, and 12V accessory power in one unit
- Supports both gas and diesel vehicles within the stated engine-size limits
- Auto-shutoff inflator can be set using PSI, BAR, KPA, or KG/CM² units
- Includes a storage box, USB-C charging cable, air hose, nozzles, and user manual
Cons
- The manufacturer advises waiting two minutes between jump-start attempts and limiting attempts to three consecutively
- The compressor should cool for five minutes after 20 minutes of continuous inflation
- The unit should be recharged every two to three months during storage
Specifications
| Color | Black Silver |
|---|---|
| Dimensions | 4.3 x 7.6 x 2.5 inches |
| Weight | 2.5 Pounds |
| Product Group | Automotive Parts and Accessories |
Best For / Avoid If
Best for buyers prioritizing
- Combines jump starting, tire inflation, device charging, and 12V accessory power in one unit
- Supports both gas and diesel vehicles within the stated engine-size limits
- Auto-shutoff inflator can be set using PSI, BAR, KPA, or KG/CM² units
Consider another option if
- The manufacturer advises waiting two minutes between jump-start attempts and limiting attempts to three consecutively
- The compressor should cool for five minutes after 20 minutes of continuous inflation
- The unit should be recharged every two to three months during storage

Pros
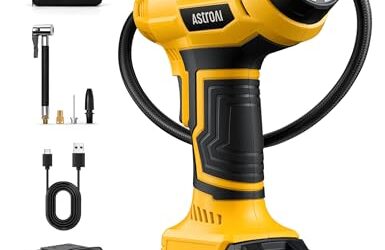
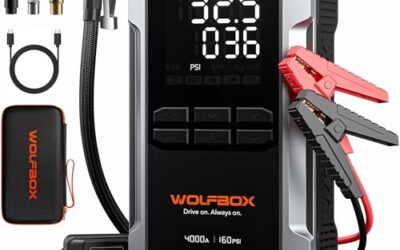
- Combines jump-starting, tire inflation, device charging, and emergency lighting in one unit
- Includes USB-C 65W charging and 160W DC continuous output
- Supports tire inflation for pickup trucks and smaller vehicles
- Provides listed protection features and a 24-month warranty
Cons
- Charging adapter is not included
- Vehicle compatibility is limited to the stated 12V system and engines up to 10L
- Amazon listing shows a 4.3 rating from 0 reviews, so review evidence is unavailable
Specifications
| Color | black and grey |
|---|---|
| Size | 4000A MV24A |
| Dimensions | 2.1653543285 x 5.2755905458 x 9.3700787306 inches |
| Weight | 5.3 pounds |
| Product Group | Automotive Parts and Accessories |
| Binding | Automotive |
Best For / Avoid If
Best for buyers prioritizing
- Combines jump-starting, tire inflation, device charging, and emergency lighting in one unit
- Includes USB-C 65W charging and 160W DC continuous output
- Supports tire inflation for pickup trucks and smaller vehicles
Consider another option if
- Charging adapter is not included
- Vehicle compatibility is limited to the stated 12V system and engines up to 10L
- Amazon listing shows a 4.3 rating from 0 reviews, so review evidence is unavailable

Pros
- Wide 3-200 PSI range spans low-pressure tires through heavy-duty truck and RV applications
- Stated ANSI B40.7 Grade 2A calibration (±1 PSI) provides a defined accuracy standard
- Thermal compensation allows use in extreme cold and heat per the listed operating range
- User-replaceable AAA batteries mean the unit does not need to be discarded when batteries drain
- LED light assists pressure checks at night or in low-light areas
Cons
- Presta valve adapter is not included and must be purchased separately for bicycle use
- Durability claims, including run-over resistance, come from the manufacturer's listing rather than independent verification
Best For / Avoid If
Best for buyers prioritizing
- Wide 3-200 PSI range spans low-pressure tires through heavy-duty truck and RV applications
- Stated ANSI B40.7 Grade 2A calibration (±1 PSI) provides a defined accuracy standard
- Thermal compensation allows use in extreme cold and heat per the listed operating range
Consider another option if
- Presta valve adapter is not included and must be purchased separately for bicycle use
- Durability claims, including run-over resistance, come from the manufacturer's listing rather than independent verification
Frequently asked questions
Can I check an inflator hose without turning on the compressor?
Only if the hose already holds pressure or the manual describes a safe test method. A hose with no pressure may not reveal a leak through bubbles. Do not pressurize it with an improvised setup.
How long should I watch for bubbles?
Watch each wet area long enough to see whether new bubbles form and grow. There is no single duration that fits every hose, leak size, soap mixture, or pressure. Retest after cleaning if the result is uncertain.
Can I use plain water instead of soapy water?
Plain water may show a large leak, but it is less useful for small leaks because it does not hold visible bubbles as well. Use a mild soapy mixture on exterior surfaces and keep it away from electrical components.
Can I repair a leaking inflator hose?
That depends on the hose construction and the inflator maker’s service instructions. Do not assume tire sealant, tape, glue, or a generic fitting makes a pressurized hose safe. Replace or service it with a compatible part when the maker permits.
Sources and further reading
- Tire Safety (NHTSA): Guidance on tire inflation, condition, and safe tire use.
- Keeping Your Vehicle in Shape (fueleconomy.gov): Maintenance guidance that includes tire care and pressure checks.