
To reduce air loss when disconnecting tire inflator, use a compatible quick-release chuck and remove it promptly with a straight motion. A brief hiss can be normal; steady airflow after removal, or pressure that keeps falling, points to a possible valve or tire leak.
Before starting, check your vehicle manual or tire placard for the correct cold pressure. Know whether your inflator uses a threaded chuck or a lever-lock chuck, and follow its instructions. No removal technique can prevent every small pressure change, especially if the chuck depresses the valve core while attached.
Key takeaways
- A short hiss during removal can come from air trapped in the chuck or hose, or from the valve core opening as the chuck releases.
- Turn off the inflator, release the chuck as its maker directs, then pull it straight off without twisting or pausing halfway.
- Do not add extra pressure as a guess to make up for expected air loss. Check pressure again with a separate gauge.
- If air continues escaping after the chuck is off, check the valve core, valve stem, and tire. Do not treat continuing leakage as normal.
- Use the vehicle’s recommended cold pressure, not the maximum pressure printed on the tire sidewall.
Why air escapes when you remove an inflator
A tire valve has a spring-loaded valve core that normally seals the opening. An inflator chuck presses on that core to let air pass into the tire. When you remove the chuck, the core should close again. The timing and seal depend on the chuck, valve, and removal method.
Some air may escape from the hose or chuck rather than from the tire. The chuck can hold a small amount of pressurized air, and that air can hiss as the connection opens. On some setups, the chuck continues pressing the valve core until it has moved far enough away from the stem. A brief sound alone does not tell you how much tire pressure changed.
Threaded chucks can take several turns to remove. During those turns, the seal may loosen before the chuck fully clears the valve. Lever-lock chucks usually release differently, but their operation varies by design. Neither type guarantees zero pressure loss. Follow the instructions for your specific inflator and chuck.
How to reduce air loss when disconnecting tire inflator
- Set the target pressure first. Find the recommended cold pressure on the driver-side door placard or in the vehicle manual. Tire sidewall pressure is not the vehicle’s target. If tires are warm, pressure readings may differ from cold specifications; follow vehicle guidance rather than letting air out based on a cold-pressure figure alone.
- Make a secure connection. Attach the chuck squarely to the valve stem. For a lever-lock chuck, place the lever in the position specified by the maker. For a threaded chuck, turn it until the seal is secure, without forcing it. A crooked or loose connection can leak while the tire is filling and make the final reading unreliable.
- Inflate and allow the reading to settle. Use the inflator’s gauge as a working reference, but do not assume it matches a separate tire gauge exactly. If the inflator has an automatic shutoff, set it according to its instructions. Shut off the pump before removing the chuck unless its manual gives a different sequence.
- Release the chuck in one deliberate motion. Unlock a lever chuck as directed, or unscrew a threaded chuck promptly. Keep the chuck aligned with the valve stem and pull it away straight once it releases. Avoid rocking it, twisting the valve stem, or stopping with the connection partly engaged.
- Listen, then check pressure. A short hiss that stops at once can be ordinary chuck or hose air. If the sound continues, move away from the opening and inspect for a leak. Use a separate gauge to check tire pressure, then add air in small increments if needed.
- Fit the valve cap. Replace the cap after checking. It helps keep dirt and moisture out of the valve opening, but it is not a fix for a leaking valve core.
What chuck type changes, and what it does not
A quick-release chuck can shorten the time needed to disconnect, which may reduce the chance of losing air through a slowly loosening connection. A threaded chuck can provide a secure connection during inflation, but it takes turns to remove. A lever-lock chuck can attach and release quickly, though the fit and release feel depend on its design and the valve stem.
Check the chuck’s fit with your valve stem and the inflator instructions. Vehicle year and model usually do not determine chuck operation, but the valve stem’s condition and access can matter. A wheel cover, tight wheel opening, or short stem may make a particular chuck awkward to use. Do not force a chuck that will not seat squarely.
For more on checking pressure independently, see CarTechTalk’s guide to digital tire pressure gauges with memory. Drivers who need access around paired rear wheels can also read the dually tire pressure gauge guide.
How to tell normal chuck hiss from a leak
| What you notice | Possible explanation | Next check |
|---|---|---|
| Brief hiss that stops as the chuck comes off | Air leaving the chuck or hose, or a short release as the valve core closes | Check tire pressure with a separate gauge. |
| Hiss continues after chuck removal | Valve core may not be sealing, or valve stem may be damaged | Keep your face away, listen briefly, and seek valve inspection if leakage continues. |
| Pressure falls again after inflation | Possible puncture, bead leak, valve leak, or another tire issue | Have the tire and valve inspected. Do not assume the chuck caused repeated pressure loss. |
| Pressure changes between inflator and separate gauge | Different gauge readings, connection loss, or pressure change during measurement | Use a reliable gauge consistently and compare readings promptly under similar conditions. |
This checklist narrows possibilities; it cannot identify the failed part by sound alone. The NHTSA tire safety page offers general tire safety information. For inflator selection and operation context, see CarTechTalk’s 12V tire inflator guide.
Common mistakes
- Adding extra air to compensate. The amount lost during removal is not fixed. Adding a guessed amount can leave the tire overinflated. Recheck with a gauge instead.
- Using sidewall maximum as the target. The sidewall figure is not the normal vehicle pressure recommendation. Use the vehicle placard or manual.
- Pulling the chuck at an angle. A sideways tug can make a poor seal during removal and put force on the valve stem. Release the chuck as specified and keep it aligned.
- Trusting only the inflator’s display. A built-in gauge is convenient, but gauge readings can differ. A separate gauge helps confirm pressure after disconnection.
- Ignoring repeated pressure loss. A tire that loses pressure after each check may have a leak. Repeatedly topping it up does not repair the cause.
- Removing a hot tire’s air to match cold pressure. Tire pressure changes with temperature. Follow the vehicle manual’s guidance for checking pressure; do not bleed a warm tire down to its cold specification based on a single reading.
When to get professional help
Stop inflating and arrange an inspection if air continues escaping at the valve after the chuck is removed, the valve stem looks cracked or bent, or pressure drops again after you have inflated the tire. A puncture or damaged valve may need repair or replacement. Do not rely on a valve cap to hold air in a leaking tire.
If the tire is visibly damaged, severely underinflated, or will not hold pressure, follow the vehicle manual’s roadside instructions. Do not drive on a tire that may be unsafe. A tire shop or roadside professional can inspect the tire, bead, valve, and wheel to find the source.
Gear that can help
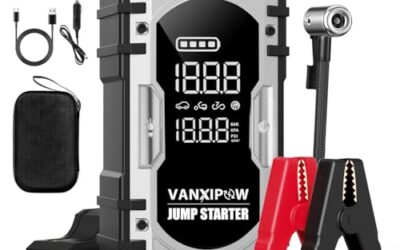
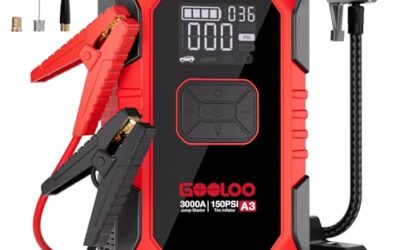
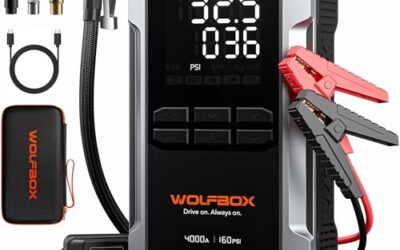
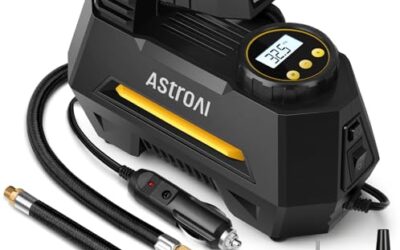
If you need tire inflators or tire pressure gauges for this job, these picks already appear in our tire inflators guides. Check the full guide for fit and who should skip each one.

Pros
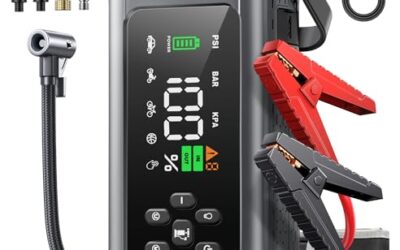
- Combines jump starting and cordless tire inflation in one portable unit
- Supports up to 150 PSI with automatic shut-off and selectable pressure units
- Includes five air nozzles and five inflation modes
- Provides stated support for more than 1,000 charge cycles
- Backed by an 18-month warranty
Cons
- The stated operating and storage temperature range is -4°F to 140°F, while charging is limited to 14°F to 113°F
- The unit should be recharged at least once every three months during long-term storage
Specifications
| Color | Red |
|---|---|
| Dimensions | 4.96 x 5.87 x 2.3 inches |
| Weight | 3.58 pounds |
| Product Group | Automotive Parts and Accessories |
Best For / Avoid If
Best for buyers prioritizing
- Combines jump starting and cordless tire inflation in one portable unit
- Supports up to 150 PSI with automatic shut-off and selectable pressure units
- Includes five air nozzles and five inflation modes
Consider another option if
- The stated operating and storage temperature range is -4°F to 140°F, while charging is limited to 14°F to 113°F
- The unit should be recharged at least once every three months during long-term storage
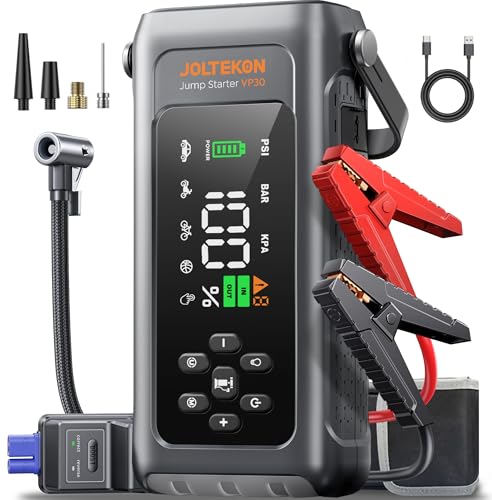
Pros
- Combines jump starting, tire inflation, lighting, and portable charging in one device
- Force-start function is specified for completely drained or low-voltage batteries
- Automatic shutoff helps prevent over-inflation
- Operating temperature is listed as -4°F to 140°F
Cons
- The product listing advises charging the unit every 2–3 months during extended storage
- Users are instructed to ensure the battery level exceeds 50% before vehicle startup
Specifications
| Dimensions | 7.88 x 1.97 x 3.78 inches |
|---|---|
| Weight | 2.645547144 pounds |
| Product Group | Automotive Parts and Accessories |
Best For / Avoid If
Best for buyers prioritizing
- Combines jump starting, tire inflation, lighting, and portable charging in one device
- Force-start function is specified for completely drained or low-voltage batteries
- Automatic shutoff helps prevent over-inflation
Consider another option if
- The product listing advises charging the unit every 2–3 months during extended storage
- Users are instructed to ensure the battery level exceeds 50% before vehicle startup

Specifications
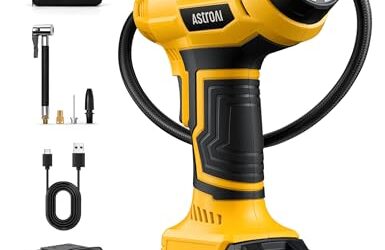
| Color | Red |
|---|---|
| Dimensions | 5 x 3 x 8 inches |
| Weight | 1.28 Pounds |
| Product Group | Tools |
| Binding | Tools & Home Improvement |
Frequently asked questions
Is a small hiss when removing an inflator normal?
It can be normal if it stops immediately. Air may leave the chuck or hose as the connection opens. A continuing hiss after removal needs attention because the valve may not be sealing.
Should I inflate above the recommended pressure to cover air loss?
No. Air loss varies by chuck and valve condition. Inflate to the vehicle-specified cold pressure, then check with a separate gauge after removing the chuck.
Does a quick-release chuck stop all air loss?
No. It can make removal faster, but it cannot guarantee zero pressure change. Correct fit, valve condition, and release technique still matter.
Can a valve cap stop a leaking valve core?
No. A cap helps protect the valve opening from dirt and moisture. It does not replace a valve core that fails to seal.
Sources and further reading
- Tire Safety (NHTSA): General information on tire safety and maintenance.
- Keeping Your Vehicle in Shape (fueleconomy.gov): Vehicle maintenance guidance, including tire care.