
To remove a car stereo, disconnect the vehicle battery as directed in its service information, release the trim and radio fasteners, then unplug the connectors without pulling on wires. Before starting, identify your vehicle’s year, make, model, stereo type, and any security or factory-system requirements; dashboard removal steps vary, and some vehicles need specialized procedures.
- Use the vehicle service manual or a reliable vehicle-specific removal guide, not a generic trim diagram.
- Gather plastic trim tools, the correct screwdriver or socket, a work light, and a container for screws.
- Keep airbags, yellow SRS connectors, and high-voltage components out of the work area.
- Photograph connections and label plugs before separating them.
- Stop if trim resists, wiring is damaged, or the radio is part of a vehicle control system.
Before you remove the car stereo
Removal instructions depend on dashboard design, stereo generation, and factory equipment. A 2005 vehicle and a 2025 vehicle can use different trim clips, fasteners, wiring, and security functions, even when their radios look similar. Find instructions for the exact vehicle and stereo configuration. Factory navigation, premium audio, backup cameras, steering-wheel controls, and climate controls may add connections or require special handling.
Check the vehicle manual for battery-disconnection steps and any radio anti-theft procedure. Some radios request a code or require a reset after power loss. Other vehicles may need a specific shutdown sequence or a waiting period before electrical work. Do not assume that disconnecting the negative battery cable is the entire procedure for every vehicle.
Tools and preparation
- Vehicle-specific instructions: Show trim-release points, fastener locations, and any precautions for your dashboard.
- Plastic trim tools: Help lift panels while reducing the chance of scratching soft trim. The tool shape must suit the panel and clip.
- Correct driver or socket: Some radios use screws, bolts, or security fasteners. The wrong tool can strip them.
- Work light and screw container: Let you see hidden fasteners and keep small parts from falling into the console.
- Labels or masking tape: Help identify plugs if several similar connectors sit behind the radio.
Park on a level surface, set the parking brake, switch the ignition off, and remove the key or keep the key fob away from the vehicle. Open a window if your vehicle can lock its doors after battery power is removed. Store loose items away from the console.
How to remove a car stereo
- Read the battery and radio instructions. Find the vehicle’s battery-disconnection procedure and learn whether the radio needs an anti-theft code. Follow any shutdown or waiting instructions for that exact vehicle. If the manual calls for a service procedure you cannot perform, stop and arrange qualified help.
- Disconnect vehicle power as instructed. Many conventional vehicles call for disconnecting the negative battery terminal, but vehicle-specific instructions take priority. Use the correct tool and keep the loose terminal from touching the battery post. Do not disconnect or probe yellow SRS wiring. Hybrid and electric vehicles can have high-voltage systems; a 12-volt battery disconnect does not make high-voltage components safe to touch.
- Locate the trim panels and fasteners. Look for visible screws, small covers, and clips shown in your vehicle-specific guide. Some fasteners hide under mats or trim caps. Avoid prying where the guide does not show a release point. A panel that will not move may still have a screw or a clip that releases in a different direction.
- Release the trim carefully. Use a plastic trim tool at the instructed edge, applying even pressure near the clip. Work around the panel instead of pulling one corner hard. Stop if the panel bends, cracks, or takes unusual force. Worn clips and cold plastic can break more easily, and clip design varies by model and year.
- Disconnect trim-mounted switches only when needed. Support the panel so its wires do not carry the panel’s weight. Release connectors by their locking tabs, not by yanking the wire bundle. Photograph the connector and its position. If a switch connector is difficult to reach, avoid twisting the panel or stretching its wiring.
- Remove the radio’s retaining hardware. Use the correct driver or socket and keep screws in a safe place. Some factory units slide out after screws are removed; others use side brackets or special radio-release keys. Do not substitute a screwdriver for release keys when the radio’s locking system calls for them.
- Slide the stereo forward a short distance. Hold its sides and draw it out only far enough to reach the rear connections. The radio may be heavier than it looks, and sharp bracket edges can cut hands. Do not pull it forward by its wiring or let it hang from a connector.
- Unplug the rear connections. Press each connector’s release tab before pulling the connector body straight out. There may be a wiring harness, antenna lead, USB connection, microphone, camera connection, or other factory interface. Connection count varies by system. Do not force a plug or pry at a locking tab with a metal tool.
- Remove the stereo and protect the opening. Set the unit on a soft, stable surface. Keep loose screws and wiring clear of the dashboard opening. If the radio will be reinstalled, store it where connectors and screens cannot be damaged.
- Decide what happens next before restoring power. A disconnected radio opening can expose wiring, and an incomplete reinstallation can leave trim loose. If reinstalling the original unit, reconnect each plug and refit parts in reverse order using the vehicle guide. If replacing it, identify the correct vehicle harness and mounting parts before connecting anything.
What changes the removal process?
| Vehicle or stereo feature | Why it matters | What to check |
|---|---|---|
| Model year and trim | Clip locations and dashboard construction can change between years and trim levels. | Match instructions to year, model, trim, and factory options. |
| Factory navigation or integrated display | The stereo may share functions with other vehicle systems, so removal can affect more than audio. | Check service information for calibration, coding, or control-system requirements. |
| Premium audio or factory amplifier | Extra connectors or an external amplifier may use a different signal path. | Identify the audio system before ordering a replacement harness. |
| Steering-wheel controls and backup camera | These features may rely on separate interfaces or vehicle-specific wiring. | Record every connector and check compatibility for the exact vehicle. |
| Hybrid or electric vehicle | High-voltage equipment adds hazards beyond ordinary 12-volt accessory wiring. | Follow manufacturer service procedures and leave high-voltage work to qualified technicians. |
| Aftermarket stereo | Previous installation may include adapters, splices, or non-factory fasteners. | Trace wiring carefully and do not assume factory colors or connectors remain unchanged. |
What to check before installing another stereo
Removing the old unit does not establish that a replacement will fit or work. Confirm the replacement’s physical size, mounting method, connector fit, and support for the vehicle’s audio and control features. A harness adapter may connect factory wiring to a new radio, but it does not automatically preserve steering-wheel controls, factory amplifiers, cameras, or vehicle menus. Those features may need separate interfaces, and support depends on the vehicle and stereo combination.
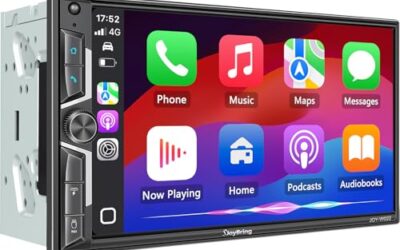
For a CarPlay or Android Auto upgrade, check the radio’s phone-connection method and the vehicle installation parts separately. Phone OS support, radio firmware, USB ports, and connection type can affect operation. A replacement head unit may also need a microphone, USB extension, antenna adapter, or a suitable mounting kit. For a broader look at format and upgrade choices, see our double-DIN car stereo guide and car stereo and speaker upgrade guide.
Do not cut factory wiring just to make plugs fit. Use a vehicle-appropriate harness or have an installer identify the circuits. Wire colors can differ by manufacturer, model year, and prior repairs. A connector that physically fits may still have a different pin assignment.
Common mistakes
- Using instructions for a similar vehicle: A nearby model year or trim may have different clips, wiring, or removal steps.
- Pulling trim before finding hidden fasteners: The result can be broken clips, cracked panels, or damaged finish.
- Yanking wires instead of releasing plugs: This can damage a connector, loosen a terminal, or break a wire inside its insulation.
- Ignoring the radio security code: Some radios may request a code after power is restored. Check the owner’s manual or vehicle records first.
- Assuming every rear plug is for the stereo: Nearby wiring can serve other systems. Identify each connector before unplugging it.
- Touching airbag wiring: Yellow SRS connectors and related circuits are not stereo wiring. Leave them alone and follow the vehicle’s safety procedure.
- Ordering a radio from dashboard size alone: Physical fit does not prove electrical or feature compatibility. Check the vehicle, factory options, and required interfaces.
When to get professional help
Use a qualified automotive installer if the stereo is integrated with climate controls, vehicle settings, factory navigation, or other modules and the service instructions are unclear. Get help if you find damaged wiring, non-factory splices, a stuck security fastener, or a trim panel that will not release with reasonable pressure.
Do not continue if you encounter yellow SRS connectors, an airbag warning, or a hybrid or EV high-voltage component. A dashboard removal mistake can damage wiring or safety equipment. A technician can identify the system and follow the correct vehicle-specific isolation procedure.
Before you buy, it is worth reading Aftermarket Head Unit Buying Guide.
Frequently asked questions
Can I remove a car stereo without disconnecting the battery?
Do not assume that is safe. Follow the vehicle’s service instructions, which may call for power isolation before unplugging the radio. Incorrect battery handling can also trigger security or system reset issues, so check those requirements first.
Will removing the stereo erase settings or require a radio code?
It can, depending on the vehicle and radio. Some units request an anti-theft code after power loss, while some vehicles may reset stored settings. Check the owner’s manual and service information before disconnecting power.
How do I release a stereo that will not slide out?
Stop pulling. Recheck for hidden screws, side brackets, or radio-release keys required by that unit. The correct retention method depends on the vehicle and stereo model; force can bend the chassis or damage dashboard trim.
Can I reuse the factory wiring with a new stereo?
Often, an adapter can connect compatible factory wiring to an aftermarket stereo, but feature support varies. Amplifiers, steering-wheel controls, cameras, and factory displays may need additional interfaces or may not be supported by a given setup.
Does removing a stereo affect CarPlay or Android Auto?
Removing the original radio ends its phone connection. A replacement can support CarPlay or Android Auto only if its model, firmware, phone, and installation accessories support the needed connection. Check CarPlay and Android Auto topics for related guidance.