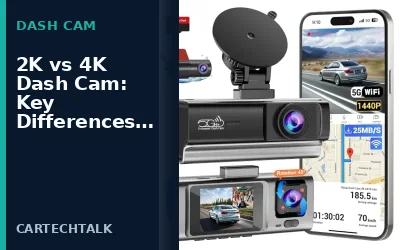

How to Transfer Dash Cam Footage to a Phone
Transferring dash cam footage to your phone allows you to view, share, and back up your videos easily without needing a computer. The process varies depending on whether your dash cam connects via WiFi, USB, SD card, or cloud storage. This guide provides clear, step-by-step instructions for the most common methods, along with compatibility notes and troubleshooting tips.
Before starting, identify your dash cam’s features, ensure your phone has sufficient storage, and follow safe handling procedures to prevent data loss or equipment damage.
Key Takeaways
- Determine your dash cam’s primary connection method: WiFi, USB, SD card, or cloud.
- Prepare your phone by checking storage space and OS compatibility.
- Use secure, stable connections to avoid interrupted transfers.
- Regularly transfer footage to prevent overwriting on the dash cam’s memory.
- Consider legal aspects of dash cam recordings in your area.
Why Transfer Dash Cam Footage to a Phone
Having dash cam videos on your phone makes it simple to review incidents, share evidence with insurance companies or law enforcement, or use as proof in disputes. Unlike the dash cam’s limited storage, your phone offers more space and easier organization through folders and apps. Dash cam footage is often used for insurance claims, accident reconstruction, or personal records, making phone-based access highly practical.
However, not all dash cams support direct phone transfer. Some rely solely on SD card removal, while others require an app or computer. Understanding your specific model is crucial for success, as features like voltage compatibility and connector types can vary by vehicle make and model year.
Identifying Your Dash Cam’s Transfer Options
Most dash cams from the last decade include at least one method for transferring footage. Check the user manual or look for labels on the device for WiFi SSID, USB port, or SD card slot details. Phone OS also plays a role, as Android devices often support more direct file access than iOS due to differences in file manager capabilities and permissions.
| Method | Description | Pros | Cons | Compatibility Notes |
|---|---|---|---|---|
| WiFi Hotspot | Connect phone to dash cam’s wireless network and download files via browser or app | Wireless, no cables needed | Requires dash cam to have WiFi, limited range, potential security risks | Works with Android and iOS; dash cams from 2018+ more common |
| SD Card Removal | Remove the memory card and insert into phone or adapter | Universal, works with any phone | Physical handling required, risk of loss or damage | Compatible with all phones; check card type (microSD, etc.) |
| USB Cable | Connect dash cam to phone using USB cable for direct file transfer | Fast, reliable for supported models | Limited to USB-enabled dash cams, may need app | Android preferred; iOS may require additional software |
| Cloud Upload and Download | Upload videos to cloud service then download to phone | Wireless, accessible from anywhere | Requires internet, storage limits on cloud | Needs dash cam with cloud support or app integration |
Method 1: Transferring via WiFi Hotspot
Many dash cams, especially those with WiFi, create their own wireless network. This allows your phone to connect directly without additional routers. The process typically involves the dash cam broadcasting its network for a short time after powering on.
- Power on the dash cam and wait for it to enter WiFi access point mode. This is usually indicated by a blinking LED or sound.
- On your phone, go to WiFi settings and select the dash cam’s network name (SSID). Enter the password if provided in the manual or on a sticker.
- Open a web browser on your phone and enter the default IP address, often 192.168.1.1 or similar, or use the dash cam’s companion app if available.
- Navigate to the file directory and select the videos you want to download. Save them to your phone’s storage.
Tip: Keep the dash cam close to your phone during transfer to maintain connection stability. Disconnect after transfer to save battery. Note that some models may require the app to be installed beforehand for easier file management.
Method 2: Removing the SD Card
This is the most straightforward method for dash cams without built-in wireless or USB transfer. It works because the footage is stored as standard files on the removable memory card.
- Shut down the dash cam properly if possible to avoid data corruption.
- Locate the SD card slot, usually on the side or bottom of the device, and remove the card carefully.
- Insert the SD card into your phone’s SD card slot or use a USB card reader/adapter connected to the phone.
- Open your phone’s file manager or gallery app to browse the card’s contents.
- Copy the video files to your phone’s internal storage.
Always use a card reader for phones without built-in slots to avoid scratches or damage. Ensure the card is not damaged and is compatible with your phone’s card slot specifications.
Method 3: Using USB Connection
Some dash cams support USB for direct connection to a computer or phone. This method transfers files directly over the wired connection without needing to remove hardware.
- Connect the USB cable from the dash cam’s USB port to your phone’s USB port.
- Your phone should detect the device; if not, install any required driver or app from the dash cam manufacturer.
- Use the file explorer on your phone to locate the dash cam’s storage and copy the video files.
Note: This method may not work seamlessly on all iPhones without additional setup. Test with your specific model. Check for any firmware updates on the dash cam to ensure USB functionality is enabled.
Using Cloud Services for Transfer
If your dash cam supports cloud storage, upload videos directly from the device or app, then download them to your phone. This provides wireless access from any location with internet.
- Log into your cloud account via the dash cam’s app or website.
- Select the videos to upload.
- Once uploaded, go to the cloud storage on your phone and download the files.
This method is ideal for remote access but requires a stable internet connection and may incur storage fees. Some dash cams integrate with services like Google Drive or Dropbox for seamless phone integration.
Common Mistakes to Avoid
- Disconnecting devices mid-transfer, which can corrupt files.
- Using low-quality or damaged SD cards that fail to read properly.
- Ignoring the need to format the card before reinserting it into the dash cam.
- Overlooking phone storage limits and deleting files after transfer.
- Assuming all dash cams support the same method without checking the manual.
When to Seek Professional Help
If you encounter persistent transfer errors, such as files not appearing or connection failures, consult the dash cam’s manufacturer support or a technician. For complex setups involving multiple devices or custom integrations, professional assistance may be necessary to ensure compatibility and data integrity. Vehicle-specific factors like power supply or connector types should be verified by experts if issues arise.
FAQ
Can I transfer dash cam footage to any phone?
No, compatibility depends on the dash cam’s transfer method and your phone’s OS and hardware. SD card removal works with nearly all phones, but WiFi or USB may require specific features.
What if my dash cam doesn’t have WiFi or USB?
Most dash cams use an SD card slot. Removing the card and using a card reader or adapter is the standard solution for transferring footage to a phone.
How do I ensure the transfer doesn’t overwrite important data?
Transfer all footage before the dash cam’s storage fills up. Regularly review and delete old videos from the dash cam after successful transfer.
Is there a risk of data loss during transfer?
Yes, if not done carefully. Always power off devices properly, use stable connections, and verify file copies after transfer.
Do I need special apps for this process?
Some dash cams require companion apps for WiFi or USB transfer. Check your manual for any required software.