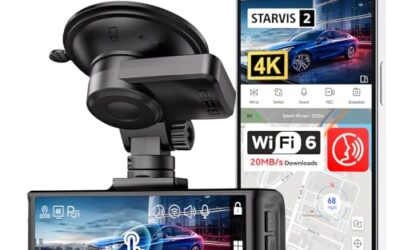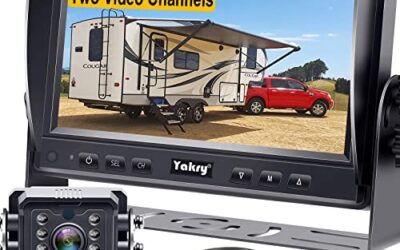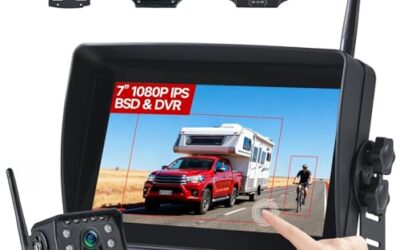

To install an aftermarket backup camera, mount the camera at the rear of the vehicle, route its video cable to a compatible display, and connect its power and reverse-trigger wires according to the kit instructions. Before starting, check your vehicle’s wiring diagram and the camera’s voltage, signal, and connector requirements; a camera that does not match the display or vehicle circuit may not work correctly.
- Most wired kits need a camera, a display or compatible head unit, a video cable, and a reverse signal.
- Some cameras receive power from the reverse-light circuit, while others use a different power source. Follow the kit diagram.
- Disconnect the battery only as directed by the vehicle service information, and keep wiring clear of airbags, moving parts, and hot surfaces.
- Test the camera before reinstalling trim, then check the picture and operation in a stationary vehicle.
What to check before installing an aftermarket backup camera
Start by identifying how your camera is meant to connect. A wired camera may send video through a composite cable, a dedicated harness, or another format. A wireless kit still needs power at the camera and receiver, and it may use a separate video connection between the receiver and display. The word “wireless” does not mean the camera installs without wiring.
Check the vehicle’s model year, trim, and installed radio. Factory radios can use vehicle-specific camera inputs, connectors, and software settings. A standard aftermarket display may accept one kind of video input while a factory screen expects another. An adapter or interface may be required, but its fit depends on the vehicle and equipment.
Read the camera and display instructions together. Compare their voltage requirements, connector types, video format, and trigger method. Some systems switch to the rear view when the display receives a reverse signal. Others use a setting in the head unit or a dedicated control wire. Do not assume wire colors are universal.
Decide where the camera can be mounted without blocking the license plate, lights, hatch movement, or normal rear visibility. The camera needs a stable mounting surface and a view that is useful from the driver’s seat. Check whether the kit is intended for an exterior mount and whether the location leaves room to route the cable through an existing grommet.
Tools and preparation
Gather the tools named in the kit and vehicle instructions. Common jobs may call for trim tools, screwdrivers, a wire stripper, a crimping tool, electrical connectors, and a multimeter. The exact tools depend on the vehicle and wiring method. Have the wiring diagram available before removing trim or making electrical connections.
Park on a level surface, apply the parking brake, and switch the ignition off. Remove the key or keep the key fob away from the vehicle if the service information calls for it. If the vehicle has airbags in the seats, roof pillars, or hatch area, do not route a cable through their deployment paths. Avoid probing unfamiliar wires, especially circuits associated with airbags or vehicle controls.
How to install aftermarket backup camera: numbered steps
- Plan the route. Trace a path from the planned camera location to the display. Look for factory wiring channels and rubber body grommets that can carry the cable without pinching it. Keep the cable away from hinges, sharp edges, exhaust parts, and moving mechanisms. If the route crosses a hatch or tailgate, account for its full movement.
- Position the camera. Hold the camera in the intended location and check its view from the driver’s seat. Make sure it does not cover the plate or interfere with a handle, lamp, or hatch. Follow the supplied mounting instructions. If drilling is required, check both sides of the panel first for wiring, glass, and other parts that a drill could damage.
- Mount the camera and protect the opening. Secure the camera with the supplied hardware or mounting method. If a cable passes through a body panel, use a suitable grommet or the kit’s sealing method to protect the cable from sharp metal and moisture. Do not leave an exposed hole that can admit water or allow the wire to chafe.
- Route the video cable forward. Guide the cable along an existing harness path where practical, securing it so it cannot rattle or snag. Remove trim carefully with the right tools. Do not pull a cable tight across a connector, hinge, or body seam. When crossing an area with side-curtain airbags, use the vehicle’s specified routing path or stop and ask a qualified installer.
- Connect the camera power. Use the wiring plan for your specific kit. If the instructions call for power from the reverse-light circuit, identify the correct circuit using the vehicle diagram rather than guessing from wire color. Other kits may call for a different source. Make connections with the specified connector method, insulate them, and secure them against vibration and moisture where appropriate.
- Connect the reverse trigger if required. The trigger tells the display when to show the rear camera. Some systems use a wire tied to the reverse-light circuit; others connect through a head-unit harness or vehicle interface. Follow the instructions for that exact system. A trigger-wire connection is not the same as the camera’s video connection, even when both wires run along the same route.
- Connect the display. Attach the camera’s video lead to the matching input on the display or interface. Connect any trigger lead and power wires as shown in the diagrams. Do not force connectors that do not match. If a factory radio needs an adapter, confirm that the adapter supports the vehicle’s camera input and reverse-switching method.
- Test before replacing trim. With the vehicle stationary and the parking brake applied, follow the vehicle and kit instructions to power the system and check the image. If the system should switch on in reverse, verify the trigger works as described in the manual. Keep clear of the vehicle’s path and do not rely on the camera while anyone is behind the vehicle.
- Finish the installation. Once the system works, secure loose wiring, reinstall trim without trapping cables, and confirm the hatch or trunk opens and closes freely. Check the camera mount and cable entry. Make a final stationary check after the interior panels are back in place.
Wiring choices and compatibility limits
The power and trigger plan is the part that most often varies by vehicle. A simple kit may use a reverse lamp for camera power and a reverse signal for the display. A different vehicle may use a control module, a factory radio interface, or a separate switched source. These arrangements are not interchangeable by assumption.
| Connection | What it does | What to check |
|---|---|---|
| Camera power | Supplies power to the rear camera. | Use the source and voltage specified by the kit. Confirm the circuit and connection method in the vehicle diagram. |
| Video cable | Carries the camera image to the screen or receiver. | Match the connector and video input. A physical plug that fits does not always mean the signal is compatible. |
| Reverse trigger | Signals the display to show the rear view. | Check whether the display needs a trigger wire, interface, or menu setting. |
| Factory-radio interface | Links an aftermarket camera to some original displays. | Vehicle year, trim, radio version, and interface support can affect compatibility. |
For a closer look at the separate connections, see how to wire a backup camera for power, video, and reverse trigger. If you are connecting a camera to an existing screen, how to connect A backup camera to your vehicle covers the connection side of the job.
Common mistakes
- Assuming wire colors match across vehicles. Harness colors can differ by vehicle, kit, and adapter. Use the wiring diagram and identify the circuit before connecting.
- Confusing power, video, and trigger wires. Each has a separate job. Connecting one in place of another can leave the camera without power or prevent the screen from switching views.
- Routing cable through an airbag path. A wire should not cross an airbag’s deployment area. If the factory routing path is unclear, have an installer handle that section.
- Leaving a panel opening unsealed. Water entry and cable wear can cause later faults. Protect the cable where it passes through metal or an exterior panel.
- Closing up before testing. Test the picture, trigger, and cable route before reinstalling trim. That makes a loose connector easier to reach.
- Expecting every factory screen to accept an aftermarket camera. Some displays require a compatible interface or may not support the camera’s signal. Check the vehicle and radio documentation before buying or wiring adapters.
When to get professional help
Ask a qualified automotive installer for help if the wiring diagram is unclear, the vehicle uses a factory camera module, or the job involves unfamiliar multiplexed wiring. Professional help is also a sensible choice if the cable must pass near airbags, if drilling could affect a structural or weather-sealed panel, or if the display needs vehicle-specific programming.
Stop if a connection causes a warning light, an electrical fault, a blown fuse, or unexpected behavior from another vehicle system. Do not keep trying different wires to find a working circuit. Restore the vehicle according to its service information and have the fault diagnosed.
Next step: How to Install a Wireless Backup Camera.
Frequently asked questions
Can I install a backup camera without replacing the factory radio?
Sometimes. The factory screen must accept the camera’s video signal, and the vehicle may need an interface or configuration change. Compatibility depends on the model year, trim, and radio equipment.
Does a wireless backup camera need wiring?
Usually, yes. Wireless kits send video without a long video cable between the camera and receiver, but the camera and display-side receiver still need power. Follow the kit’s wiring diagram.
Should the camera connect to the reverse lights?
Only if the kit and vehicle instructions call for that connection. Some systems use the reverse-light circuit for power, triggering, or both. Identify each connection separately rather than assuming one wire handles every function.
Why does the screen stay black after installation?
Possible causes include a camera without power, a loose or incompatible video connection, a missing reverse trigger, or a display setting or interface issue. Check the kit diagram and connector seating with the vehicle stationary. Do not probe unknown circuits.
Can I rely on the camera instead of looking behind the vehicle?
No. A camera can have blind spots, a limited view, or a temporary signal problem. Use it as an aid and check the area around the vehicle before moving.