
How to Use a Floor Jack Safely
Using a floor jack safely is crucial for vehicle maintenance and repair work. A floor jack is a tool that lifts the vehicle to allow access to the underside for various tasks such as oil changes, brake replacements, or suspension repairs. However, improper use can lead to serious accidents, including vehicle rollover or crushing injuries. This guide explains the prerequisites, step-by-step process, safety tips, and common pitfalls to help you use a floor jack safely every time.
Whether you are a seasoned DIY enthusiast or a first-time user, following these guidelines will ensure your safety and the longevity of your vehicle. Remember, a floor jack is only as safe as the user who operates it.
Key Takeaways
- Always inspect the floor jack for any signs of damage or wear before each use.
- Confirm that the jack’s capacity rating exceeds the vehicle’s weight.
- Never work under a vehicle supported solely by a floor jack; use jack stands.
- Position the jack on a flat, level, and stable surface free of debris.
- Use the correct lift points specified for your vehicle model and year.
- Lower the vehicle slowly and maintain control at all times.
- Keep tools and yourself clear of the vehicle during lifting and lowering.
Understanding Floor Jacks: Types and Applications
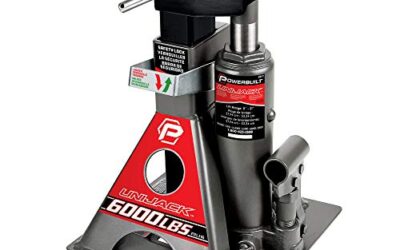
Floor jacks come in various designs, each suited for different needs. Bottle jacks are tall, hydraulic devices that can lift heavy loads like trucks or SUVs. They work by pumping a lever to force hydraulic fluid into the cylinder, extending the ram. Scissor jacks use a ratcheting mechanism to raise the vehicle. For professional use, transmission jacks are designed to hold and maneuver heavy components like engines or transmissions.
Choosing the right type depends on the vehicle’s weight, the type of lift required, and the space available. For passenger cars, a standard bottle jack rated for at least 2 tons is typically sufficient. Always check the manufacturer’s specifications for compatibility with your vehicle model-year.
Essential Safety Equipment and Precautions
Safety is paramount when using a floor jack. Beyond the jack itself, you should have jack stands, a floor mat, and possibly a creeper or rolling jack. Jack stands provide a stable support for the vehicle once it is lifted, preventing it from falling if the jack fails. Never rely on the floor jack alone for support during work.
Other precautions include wearing appropriate footwear and clothing, ensuring good lighting, and keeping the work area clear of obstacles. If the vehicle is on an incline, the risk increases significantly, so always park on level ground. Additionally, never use a floor jack on soft surfaces like sand or grass, as it can cause the jack to sink and lose stability.
How to Choose the Right Floor Jack for Your Vehicle
Selecting an appropriate floor jack involves considering several factors. First, determine the maximum weight of your vehicle, including passengers and cargo. Most passenger cars weigh between 2,500 and 4,000 pounds, so a jack rated for 3 tons or more is ideal. For heavier vehicles like pickups, opt for a higher capacity jack.
Also, consider the type of jack: a bottle jack for general use, or a scissor jack if you need a lower profile for underbody access. Ensure the saddle or pad is compatible with your vehicle’s lift points to avoid damaging the body or frame. Some vehicles have specific points marked or specified in the owner’s manual. It is important to note that using the wrong points can lead to structural damage.
Finally, check for features like rubber pads to protect the vehicle’s finish and a release valve for controlled lowering. Read reviews and specifications carefully, but remember that manufacturer claims should be verified with your vehicle’s requirements.
Step-by-Step Guide to Using a Floor Jack Safely
Step 1: Prepare the Work Area
Begin by parking the vehicle on a flat, level surface. Ensure the ground is firm and free of rocks, potholes, or debris that could cause instability. Clear the area around the vehicle to prevent accidents. If possible, use wheel chocks to prevent the vehicle from rolling.
Next, gather all necessary tools and equipment, including your floor jack, jack stands, a floor mat to protect the jack, and any other items you will need for the job. Have a fire extinguisher nearby if working near flammable fluids.
Step 2: Position the Floor Jack
Locate the correct lift points for your vehicle. These are typically marked on the underside or specified in the manual. Common points include the frame rails, unibody points, or specific locations for different models. For example, on many cars, the jack points are near the front and rear suspension components.
Place the floor jack under the lift point, ensuring the saddle is centered and stable. Adjust the height if necessary by using the floor mat or blocks if the ground is uneven. Never place the jack under the engine oil pan, transmission, or any other non-lift point, as this can cause damage or failure.
Step 3: Lift the Vehicle
Once positioned, slowly pump the lever or turn the ratchet to raise the vehicle. Lift gradually, checking for any signs of instability. Stop if the vehicle starts to rock or tilt. Aim to lift just enough to insert the jack stands.
Important: Do not lift the vehicle higher than necessary. Over-lifting can make it harder to control and increases the risk of the vehicle slipping off the jack.
Step 4: Install Jack Stands
With the vehicle safely raised, slide the jack stands into position under the lift points. Ensure they are on the same side as the jack for balance. Lower the vehicle slowly until the stands take the weight. Verify that the stands are securely placed and the vehicle is stable.
Always use the correct height stands for your vehicle. If the stands are not rated for the load, replace them immediately.
Step 5: Perform the Maintenance or Repair
Now that the vehicle is securely supported, you can work on the underside. Keep in mind that the floor jack is not designed for prolonged support; it is meant for temporary lifting. If the job takes longer than a few minutes, consider additional supports or professional help.
While working, inspect the vehicle for any issues and document your work. Be cautious of moving parts and hot components.
Step 6: Lower the Vehicle
Before lowering, double-check that all tools and yourself are clear. Slowly release the pressure from the jack or turn the ratchet to lower the vehicle onto the stands. Once the vehicle is on the stands, remove the jack carefully.
Finally, remove the jack stands and lower the vehicle to the ground. Inspect the area for any damage or issues caused by the lifting process.
Step 7: Clean Up and Store the Equipment
After completing the task, retract the jack, clean it, and store it in a safe place. Inspect it again before next use to ensure it is in good condition.
Common Mistakes to Avoid When Using a Floor Jack
Many accidents occur due to common errors. One frequent mistake is not inspecting the jack before use. Check for cracks, leaks, or worn parts. Another is exceeding the rated capacity. Always know your vehicle’s weight and the jack’s limit.
Using the wrong lift points is dangerous and can cause frame damage. Rushing through the process increases the chance of errors. Not using jack stands leaves the vehicle unsupported, a major risk. Ignoring the vehicle’s manual can lead to incompatibility issues. Finally, not securing the vehicle properly on uneven ground can result in tipping.
Expanding on this, another mistake is using the floor jack to support the vehicle while someone is working underneath without proper stands. This is extremely dangerous and should never be done. Always ensure the vehicle is fully supported before climbing under it.
Additionally, failing to use the release valve correctly when lowering can lead to sudden drops, which can damage the vehicle or injure the user. Practice using the release valve in a controlled manner.
Some users forget to check the jack’s capacity against the vehicle’s actual weight. For instance, a jack rated for 1 ton may not be enough for a heavy SUV. Always calculate or look up the weight.
Another error is not cleaning the jack after use, leading to rust or reduced performance. Regular maintenance is key to safety.
Overlooking the condition of the rubber pads can cause the jack to slip. Replace them if they are worn.
Using a floor jack in a garage without proper ventilation if using air tools, but since it is hydraulic, it is less of an issue, but still ensure the area is safe.
Finally, not having a plan for what to do if the jack fails. Have a backup plan or know how to lower it.
When to Get Professional Help
If you are unsure about the correct lift points or the jack’s compatibility with your vehicle, it is best to consult a professional mechanic. For vehicles over a certain weight or those with complex systems, professional assistance is recommended. Additionally, if you lack experience or the job involves heavy components, call a pro to avoid potential injuries.
Professional mechanics have the tools, knowledge, and experience to handle vehicle lifting safely. They can also perform more complex tasks that require precision and care.
Understanding the Risks and Physics of Vehicle Lifting
When using a floor jack, it is important to understand the physics involved. The vehicle has a center of gravity that must be balanced. If the jack is not placed correctly, the vehicle can tip over. This is why lift points are important – they are designed to support the weight without shifting the center of gravity too much.
Hydraulic systems work on Pascal’s law, where pressure applied to a fluid is transmitted equally. This allows the jack to lift heavy loads with less effort. However, if there is a leak or the seals are bad, the pressure can drop, leading to failure.
Stability is key. The jack must have a wide base to prevent tipping. For tall bottle jacks, they can be unstable if not weighted or placed properly.
Maintaining Your Floor Jack for Longevity and Safety
Regular maintenance ensures your floor jack remains safe and effective. After each use, wipe down the jack to remove dirt and grease. Check all connections for tightness. Lubricate moving parts as per the manual to ensure smooth operation.
Store the jack in a dry place to prevent rust. Avoid storing it in direct sunlight, which can degrade rubber components. If you notice any unusual noises or resistance, stop using it and have it serviced.
By following these maintenance tips, you can extend the life of your floor jack and reduce the risk of sudden failures.
| Type of Jack | Capacity Range | Best Application | Key Safety Note |
|---|---|---|---|
| Bottle Jack | 1.5 to 6 tons | Passenger cars and light trucks | Ensure rubber pad is in good condition |
| Scissor Jack | 1 to 3 tons | Light vehicles, emergency use | Check for stripped teeth on ratchet |
| Transmission Jack | 0.5 to 2 tons | Engine and transmission removal | Always use with a stable stand |
This table provides a quick reference for selecting the appropriate floor jack based on your needs.