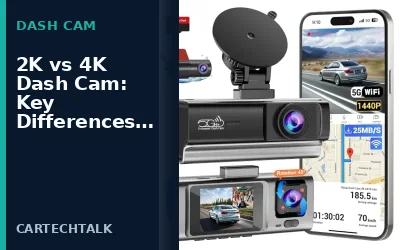

How to Install a Dash Cam: Step-by-Step Guide
Installing a dash cam is a straightforward process that enhances vehicle security and provides evidence in case of accidents. It typically involves mounting the camera unit, connecting it to power and storage, and configuring settings, usually taking 30-60 minutes depending on vehicle model and camera type.
- Choose the right dash cam for your vehicle and needs
- Securely mount the camera without obstructing your view
- Connect to a constant power source using a hardwire kit
- Format and insert a high-quality microSD card
- Configure settings via the app or menu for optimal performance
What is a Dash Cam?
A dash cam is a small camera that records video from inside the vehicle, capturing the road ahead and sometimes the interior. It works by continuously recording or triggering on impact using a G-sensor. Dash cams apply to enhancing safety, providing evidence for insurance claims, and legal purposes in accidents. Limitations include potential privacy concerns in some regions and the need for proper installation to avoid obstructing the driver’s view. Common misconceptions are that dash cams replace mirrors or that they are illegal everywhere. Understanding these aspects helps users set realistic expectations for their installation. A dash cam is a small camera that records video from inside the vehicle, capturing the road ahead and sometimes the interior. It works by continuously recording or triggering on impact using a G-sensor. Dash cams apply to enhancing safety, providing evidence for insurance claims, and legal purposes in accidents. Limitations include potential privacy concerns in some regions and the need for proper installation to avoid obstructing the driver’s view. Common misconceptions are that dash cams replace mirrors or that they are illegal everywhere.
Choosing the Right Dash Cam
When selecting a dash cam, consider resolution such as 1080p or 4K for clearer footage. Storage capacity is important, with microSD cards of 32GB or larger recommended. Power options include models with built-in batteries or those requiring hardwire kits for constant power. Features like WiFi, GPS, and parking mode add convenience but increase cost. Compatibility with your vehicle’s 12V system is essential. Always check for regional regulations regarding dash cams. There are different types of dash cams including single channel, dual channel, and those with GPS. Single channel records only front, dual records front and rear. GPS helps in geotagging videos for location data. Parking mode allows the cam to record when the vehicle is parked, useful for monitoring the surroundings. Always consider the power draw and ensure it doesn’t interfere with other vehicle electronics.
Tools and Materials Needed
To install a dash cam, you will need the dash cam itself, a microSD card (at least 64GB for best results), adhesive mounts or brackets, zip ties for cable management, wire strippers, and optionally a hardwire kit to tap into the vehicle’s fuse box. Ensure you have a Phillips screwdriver and a flathead for any adjustments. It is also helpful to have a 12V power outlet tester to ensure the hardwire kit is connected to a constant power source.
Step-by-Step Installation Guide
Follow these steps to install your dash cam safely and effectively:
- Park your vehicle in a safe location and turn off the engine.
- Choose a mounting position that doesn’t obstruct your view of the road. Common spots include the dashboard or windshield.
- Attach the camera mount using adhesive or screws, ensuring it’s stable.
- Connect the power cable to the hardwire kit or cigarette lighter adapter.
- Insert the formatted microSD card into the camera.
- Power on the camera and access the menu or app to set date, time, and recording modes.
- Test the installation by driving and checking the footage.
Make sure to route the cables neatly to avoid tripping hazards and secure them with zip ties. Step 1: Safety first – Park in a safe spot and turn off the vehicle to avoid any electrical issues while working. Step 2: Positioning is critical for optimal coverage without glare or reflection issues. Step 3: Use appropriate fasteners that can withstand automotive vibrations and temperatures. Step 4: Ensure all connections are secure and insulated to prevent corrosion or short circuits. Step 5: Verify the camera is powered correctly before final adjustments.
Common Mistakes
One common mistake is not using a hardwire kit, which can drain your vehicle’s battery over time. Another is mounting the camera too high or in a way that blocks the view. Failing to format the SD card properly can lead to corrupted files. Ignoring firmware updates may miss out on bug fixes and new features. Always double-check connections to prevent short circuits. Additional mistakes include using low-quality SD cards that fail quickly, not securing cables properly leading to damage, and overlooking vehicle-specific wiring issues in models with multiple electronics modules.
When to Get Professional Help
If you are not comfortable with electrical work or if your vehicle has complex wiring like in modern cars with CAN bus systems, consider getting professional help. This is especially important for vehicles with advanced driver assistance systems where tampering might affect safety features. Professional installation ensures proper integration and compliance with vehicle manufacturer guidelines.
FAQ
How long does it take to install a dash cam?
Most installations take between 30 minutes to an hour, depending on the complexity of the vehicle and camera model.
What type of microSD card should I use?
Use a high-quality microSD card with at least 64GB capacity, preferably Class 10 or U3 for better performance.
Is it legal to install a dash cam?
Laws vary by location. In many US states, dash cams are legal as long as they don’t obstruct the driver’s view or record audio without consent.
How do I view the dash cam footage?
Most dash cams can be viewed by removing the microSD card and inserting it into a computer or using the built-in WiFi to connect to a smartphone app.
Can I install a dash cam in any vehicle?
Yes, but ensure compatibility with your vehicle’s power system and check for any specific mounting requirements based on the model year.
What are the best practices for dash cam installation?
Best practices include using adhesive mounts that are rated for automotive use, routing cables away from hot areas, and regularly checking for loose connections. Also, consider using a hardwire kit to prevent battery drain and ensure the camera is mounted at eye level for the driver.
How do I format the microSD card?
Format the card in the dash cam itself or on a computer using FAT32 file system. Avoid using the card in other devices until formatted for the cam to prevent compatibility issues.
What if my dash cam doesn’t record?
Check power connections, SD card insertion, and settings. Ensure the G-sensor is enabled if using impact recording. Verify the camera is powered correctly and try a different SD card.