
How to Use a Portable Jump Starter
A portable jump starter is a compact device that provides an instant power boost to a dead car battery using its built-in rechargeable battery. It eliminates the need for jumper cables and a second vehicle, making it ideal for emergencies. To use a portable jump starter effectively and safely, follow the manufacturer’s instructions and consider your vehicle’s specifications.
This guide covers the basics of how to use a portable jump starter, including safety tips, step-by-step procedures, compatibility considerations, and troubleshooting to help you get back on the road quickly.
Key Takeaways
- Verify battery voltage compatibility before use.
- Always prioritize safety by following proper connection order and precautions.
- Allow the engine to run for a few minutes after starting.
- Store the jump starter in a cool, dry location.
- Check for vehicle-specific limitations, such as start-stop systems.
What is a Portable Jump Starter?
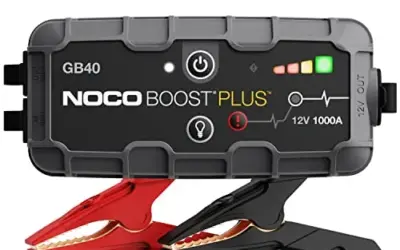
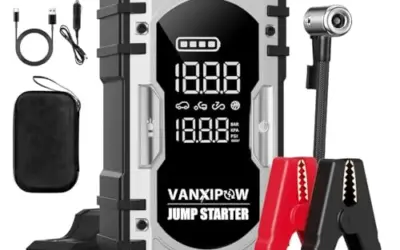
Portable jump starters are self-contained units that combine a battery, cables, and sometimes additional features like USB charging ports into one portable package. They are designed for quick vehicle restarts in situations where traditional methods are impractical. These devices are particularly useful for solo drivers, those in remote locations, or anyone who wants to avoid the hassle of finding another vehicle.
They operate on the principle of delivering a high current surge to the vehicle’s battery to overcome the dead condition. The exact output varies by model, but most provide 12 volts and 500-2000 peak amps or more. Understanding the technology helps in selecting the appropriate device for different vehicle types and conditions.
How Does a Portable Jump Starter Work?
Portable jump starters work by converting the energy stored in their internal lithium-ion battery into electrical power delivered through the jump-start cables. When connected correctly, the surge energizes the vehicle’s starter motor, allowing the engine to turn over and start.
The process is similar to using a traditional jump starter but without the need for a donor vehicle. The built-in safety circuitry prevents reverse polarity connections, which could otherwise damage the vehicle’s sensitive electronics. Many models include LED indicators to show the remaining charge level and connection status.
Limitations include the finite number of uses per charge, typically 20-100 depending on the model and output settings. For vehicles with very low batteries or those that have been sitting for extended periods, the jump starter may need multiple attempts or additional time to fully recharge the battery.
Safety Precautions When Using a Portable Jump Starter
Safety should always come first when using any automotive equipment. Here are important precautions:
- Ensure the area is well-ventilated and free of sparks or flames.
- Do not use the jump starter near flammable liquids or gases.
- Inspect the jump starter and cables for any signs of damage before use.
- Never jump-start a battery that is frozen or has visible damage.
- Keep all connections secure but avoid over-tightening.
- Do not touch the battery terminals while the engine is running.
Additionally, if your vehicle has a start-stop system, consult the manual as standard jump starters may not be compatible without modifications.
Step-by-Step Guide to Using a Portable Jump Starter
Step 1: Gather Your Supplies
Collect your portable jump starter, the jump-start cables, and any other accessories. Ensure the device is charged to at least 50% capacity. Check the battery level using the display or indicator lights.
Step 2: Park the Vehicle
Park the vehicle in a safe location with the engine off. Engage the parking brake. Turn off all lights and accessories to reduce power draw.
Step 3: Identify the Battery Terminals
Open the hood and locate the positive and negative terminals. Note their positions, as they can vary. Clean any corrosion from the terminals using a wire brush or baking soda solution if needed.
Step 4: Connect the Cables
Connect the positive (red) cable to the positive terminal first. Then connect the negative (black) cable to the negative terminal. For some models, there may be a specific sequence or additional steps like connecting to the engine block.
Make sure the cables do not touch each other or any metal parts of the engine compartment.
Step 5: Start the Engine
Set the vehicle’s ignition to the on position. Wait a few seconds, then crank the engine. If it does not start immediately, wait 30 seconds and try again. Once started, let the engine idle for 5-10 minutes to allow the battery to recharge.
Step 6: Disconnect the Cables
Disconnect the negative cable first, then the positive cable. This prevents any potential short circuits or sparks.
Step 7: Drive and Monitor
Drive the vehicle normally for a short distance. Monitor the dashboard for any warning lights. If the battery was severely discharged, it may take several drive cycles to fully recharge.
Choosing the Right Portable Jump Starter
Selecting the appropriate portable jump starter depends on your vehicle’s battery specifications and usage needs. Consider the following factors:
- Voltage: Most passenger vehicles use 12-volt systems. Ensure the jump starter outputs at least 12 volts.
- Amperage: Higher peak amps are better for larger batteries or those with low CCA ratings.
- Features: Look for models with multiple ports, digital displays, or built-in lights for added convenience.
- Compatibility: Check for compatibility with start-stop technology or hybrid vehicles, which may require higher output or specific models.
Always refer to your vehicle’s owner’s manual for recommended jump-starting procedures. If your vehicle has a dual battery system, additional considerations may apply.
| Vehicle Category | Recommended Voltage | Recommended Amperage | Special Considerations |
|---|---|---|---|
| Passenger Cars | 12V | 500-1000A | Standard use; check for start-stop systems |
| Light Trucks | 12V or 24V | 1000-2000A | Verify dual battery setup if applicable |
| Motorcycles | 12V | 200-500A | Lower power may be sufficient; use appropriate clamps |
| RVs and Boats | 12V or 24V | 2000A+ | Ensure sufficient capacity for larger batteries |
This table provides general guidelines. Always confirm with the specific jump starter’s specifications and your vehicle’s requirements.
Common Mistakes When Using a Portable Jump Starter
Avoiding common errors can prevent damage and ensure successful use. Common mistakes include:
- Connecting the cables in the wrong order, leading to reverse polarity.
- Using the jump starter on a frozen battery, which can cause the battery to explode.
- Not waiting long enough after connection before attempting to start the engine.
- Ignoring the vehicle’s electrical system after jump-starting, such as leaving lights on.
- Storing the jump starter in extreme temperatures, which can reduce its lifespan.
- Attempting to jump-start a battery with visible damage or corrosion.
Troubleshooting Common Issues
If the vehicle does not start after using the portable jump starter, try these steps:
- Ensure all connections are tight and in the correct order.
- Verify that the jump starter has adequate charge.
- Check the battery terminals for corrosion and clean them.
- Try connecting the cables to the battery terminals in a different location if possible.
- Allow the vehicle to sit for 10-15 minutes and try again.
If the problem persists, it could indicate a faulty battery or other electrical issues. In such cases, professional diagnosis is recommended.
When to Seek Professional Help
While portable jump starters are designed for safe use, there are situations where professional assistance is necessary. Contact a mechanic or roadside assistance if:
- The battery is frozen or has been submerged in water.
- You are not comfortable with the jump starter’s operation.
- The vehicle continues to have battery issues after multiple jump starts.
- There are any warning lights or unusual noises from the vehicle.
Professional help can provide a thorough inspection and ensure the vehicle’s electrical system is functioning correctly.
FAQ
How many times can a portable jump starter be used?
The number of uses depends on the model and output settings. Typically, basic models can provide 20-50 starts per charge, while higher-capacity models may offer more. Always recharge the jump starter after use.
Can portable jump starters be used on motorcycles?
Yes, many portable jump starters are compatible with motorcycles. Choose a model with appropriate voltage and lower amperage if needed. Ensure the clamps fit the motorcycle’s battery terminals.
What should I do if the jump starter fails to start the vehicle?
Double-check connections, ensure the jump starter is charged, and try again after a short wait. If it still fails, the battery may be too depleted or faulty. Consider professional assistance.
Are there any vehicle models that cannot use portable jump starters?
Most modern vehicles can use portable jump starters, but those with start-stop systems or advanced electronics may require specific models with higher output. Always check compatibility with your vehicle’s manual.
How do I store a portable jump starter?
Store the jump starter in a cool, dry place away from direct sunlight and extreme temperatures. Avoid leaving it in a vehicle during hot or cold weather. Periodically recharge it to maintain battery health.