
How To Connect A Jump Starter
Connecting a jump starter to a dead vehicle battery is a straightforward process that can get your car running again quickly. The key is following proper safety protocols and connecting the cables in the correct order to avoid damage or injury. This guide provides a detailed explanation of how to connect a jump starter safely and effectively for various vehicles.
Key takeaways
- Always wear safety goggles and gloves when handling jump starters.
- Connect the positive terminal first on both the jump starter and the vehicle battery.
- Ensure your jump starter is compatible with the vehicle’s voltage rating, typically 12 volts for most cars.
- Disconnect the cables in the reverse order after the vehicle starts.
What Are Jump Starters and How Do They Work?
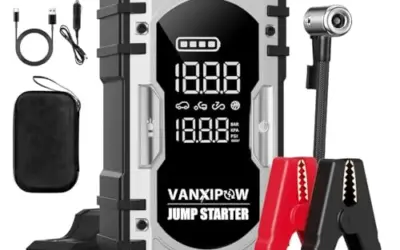
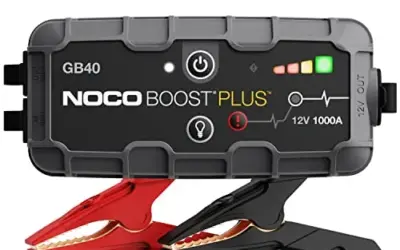
A jump starter is a portable device designed to provide a temporary boost to a vehicle’s battery when it is completely drained. Unlike traditional jump starting with another vehicle, jump starters use built-in capacitors or rechargeable batteries to deliver a quick surge of power. They are particularly useful in situations where another vehicle is not available or when dealing with multiple vehicles in a parking lot.
Jump starters work by converting stored energy into electrical current through a process called discharging. The device connects to the vehicle’s battery terminals, allowing the current to flow and recharge the dead battery. Most jump starters are rated for 12-volt systems, which is standard for passenger cars, trucks, and SUVs. However, some heavy-duty models are available for 24-volt applications in larger vehicles or RVs.
They apply to a wide range of vehicles, including cars, motorcycles, boats, and lawn equipment. Limitations include their inability to replace a faulty battery or alternator, and they may not work on vehicles with severely damaged batteries. Compatibility is crucial; using a jump starter on the wrong voltage can cause electrical damage.
The energy storage in jump starters can be through supercapacitors for instant power or small rechargeable batteries for repeated use. Supercapacitor models are ideal for emergency use as they can provide thousands of jump starts without recharging, while battery models are better for frequent use as they can be recharged from a wall outlet. Understanding these differences helps users select the right tool for their needs, whether for occasional roadside assistance or regular maintenance.
Safety First: Essential Precautions When Using a Jump Starter
Safety should always come first when connecting a jump starter. Here are the key precautions:
- Read the manufacturer’s instructions carefully before use.
- Wear protective eyewear to shield your eyes from sparks or splashes.
- Ensure the area is well-ventilated and free from flammable materials.
- Do not smoke or use open flames near the battery.
- Keep children and pets away from the equipment.
- Never lean over the battery while connecting cables.
These steps help prevent accidents and ensure a safe experience. Always follow local laws regarding vehicle maintenance and battery handling. Additional precautions include ensuring the jump starter has a proper grounding connection to avoid electrical hazards, and in cases of extreme weather, avoiding use if the device or battery is exposed to freezing temperatures that could affect performance or cause damage.
Choosing the Right Jump Starter for Your Vehicle
Selecting an appropriate jump starter depends on your vehicle’s specifications. Most personal vehicles use 12-volt jump starters, but check your owner’s manual for the exact voltage. For example, many cars and light trucks are 12V, while some trucks and vans may require 24V systems. The capacity of the jump starter should match the battery size; a larger capacity provides more power for bigger batteries or colder climates.
Consider the type of connections: traditional cables with alligator clips, remote clamps for vehicles with remote negative terminals, or direct connect models. Some models include built-in lights or multiple ports for charging other devices. However, ensure the jump starter has the correct output voltage and amperage to avoid overloading the vehicle’s electrical system.
Compatibility limits: Jump starters are not suitable for all battery chemistries equally. Lead-acid batteries are common, but lithium-ion batteries may require specific adapters or different procedures. Always verify the voltage rating on the jump starter matches your vehicle’s battery.
Additionally, consider the environment in which you will use the jump starter. In cold climates, a higher capacity model is recommended because cold temperatures reduce battery efficiency. For hot climates, ensure the device has proper heat dissipation to prevent overheating during use. Always check the jump starter’s specifications for maximum operating temperature and storage conditions.
Another important factor is the type of battery in your vehicle. Most modern vehicles use maintenance-free lead-acid batteries, but some use AGM or gel batteries which have different charging requirements. Jump starters are generally compatible with these, but ensure the device is rated for the specific chemistry to prevent undercharging or damage.
Here is a comparison of common connection methods:
| Method | Vehicle Type | Advantages | Disadvantages |
|---|---|---|---|
| Direct Connect Cables | Standard cars with accessible terminals | Quick, no extra accessories needed | Risk of sparks if not careful |
| Remote Negative Clamps | Vehicles with remote battery terminals | Reduces spark risk on battery | May not fit all models |
| Direct Terminal Clamps | Modern vehicles with easy access | Fast installation | Requires hood open |
This table helps users choose the best method based on their vehicle setup.
Step-by-Step Guide: How to Connect a Jump Starter
Follow these detailed steps to connect a jump starter safely:
- Prepare the vehicle: Park the dead vehicle in an open area away from other traffic. Turn off all accessories, lights, and the engine if running. Ensure the parking brake is engaged.
- Inspect the jump starter: Check the device for any damage and ensure it is fully charged or has sufficient power. Read the user manual for specific instructions.
- Locate the battery terminals: Open the hood and identify the positive (+) and negative (-) terminals on the dead vehicle’s battery. Positive is usually red or marked with a plus sign, negative is black or marked with a minus.
- Connect the positive cables: Attach the positive clamp or cable from the jump starter to the positive terminal of the dead battery. Do not connect it to the negative terminal at this stage.
- Connect the negative cable: Attach the negative clamp or cable to a clean metal ground point on the engine block or chassis, away from the battery. Avoid connecting directly to the negative terminal of the dead battery if possible, as this can cause sparks.
- Start the vehicle: Start the dead vehicle’s engine. It may take a few attempts as the jump starter provides a surge. Once running, let it idle for a few minutes to allow the alternator to charge the battery.
- Disconnect the cables in reverse order: First, remove the negative cable from the ground point, then the positive cable from the battery terminal. This prevents sparks.
Variations exist for different vehicles. For cars with remote negative terminals, use the remote clamp accessory if provided with the jump starter. For motorcycles, connect to the battery terminals directly or use specific adapters. Always double-check the polarity to avoid reversing the connections, which could damage the vehicle’s electronics.
Understanding battery polarity is essential because reversing the connections can lead to damage to the vehicle’s sensitive electronics, potential fire hazards, or reduced lifespan of the battery. Always confirm the markings on the terminals before proceeding.
Common Mistakes When Connecting a Jump Starter
Many users make errors that can lead to failed attempts or safety issues. Here are common mistakes and how to avoid them:
- Connecting negative first: This can cause sparks and damage the battery or jump starter. Always connect positive first.
- Ignoring the ground point: Connecting negative directly to the negative terminal can cause excessive current flow and damage. Use a clean engine block instead.
- Using the wrong voltage: A 12V jump starter on a 24V vehicle will not work properly and may cause damage.
- Leaving cables connected too long: Once the vehicle starts, disconnect promptly to avoid draining the jump starter unnecessarily.
- Not checking battery condition: If the vehicle doesn’t start after a few tries, the battery may be faulty and needs replacement.
Additional mistakes include failing to ensure the jump starter is compatible with the vehicle’s electrical system, which can lead to overloading and potential failure of the alternator or other components. Users should also avoid using jump starters in enclosed spaces, as this can lead to gas buildup from the battery.
Troubleshooting Common Issues
If your vehicle still won’t start after connecting the jump starter, follow this checklist:
- Verify all connections are secure and in the correct order.
- Check if the jump starter is charged by testing with another device.
- Ensure the vehicle battery is not frozen or damaged.
- Try connecting the negative cable to the negative terminal instead of the ground point.
- Allow the vehicle to sit for 10-15 minutes after starting, then try starting again.
If issues persist, the battery may be completely dead or the alternator faulty. In such cases, professional assistance is recommended. Troubleshooting should always start with the safest and easiest checks to minimize risk.
When to Seek Professional Help
While jump starters are useful for temporary boosts, there are situations where professional help is necessary. If the vehicle does not start after several attempts, the battery is likely faulty and should be replaced. Signs of a bad battery include sulfation, corrosion, or swelling. Additionally, if you notice any unusual odors or leaks from the battery, stop using the jump starter and seek professional service immediately.
Professional mechanics can diagnose underlying issues like alternator problems or electrical faults that jump starters cannot address. For vehicles under warranty or with complex electronics, it’s best to consult a certified technician to avoid further damage. Never attempt repairs on high-voltage systems without proper training and equipment.
FAQ
How long should the jump starter stay connected?
Typically, leave it connected for 5-10 minutes after the vehicle starts to allow the alternator to recharge the battery. Do not leave it connected indefinitely.
What if my vehicle has a remote negative terminal?
Use the remote clamp accessory if provided with your jump starter. Connect the clamp to the remote terminal and the other end to the jump starter’s negative output.
Can jump starters be used on motorcycles?
Yes, but use motorcycle-specific jump starters or adapters. Ensure the voltage matches the motorcycle’s battery, usually 12V.
What’s the difference between a jump starter and a battery charger?
A jump starter provides a quick boost for starting, while a battery charger slowly recharges the battery over time. Use a charger for maintenance, not for jump starting.
How do I know if my battery is dead?
Signs include the engine cranking slowly or not at all, dim lights, and a clicking sound when trying to start.