
To clean battery terminals safely, turn off the vehicle, wear eye protection and gloves, disconnect the negative cable first, then clean corrosion with a baking-soda solution and a terminal brush. Reconnect the positive cable first, followed by the negative cable, and stop if the battery case, cables or terminals show serious damage.
Battery corrosion can raise electrical resistance. That may cause slow cranking, intermittent power, dim lights or charging problems. Cleaning restores contact only when corrosion causes the fault. It cannot repair a weak battery, damaged cable, alternator problem or parasitic electrical drain.
Key takeaways
- Park outside or in a well-ventilated area. Keep sparks, flames and cigarettes away from the battery.
- Disconnect the negative cable before the positive cable. Reconnect positive first.
- Use a small amount of baking soda mixed with water on external corrosion. Keep liquid away from battery vents and vehicle electronics.
- Do not clean a cracked, swollen, leaking or frozen battery. Arrange professional service or proper battery replacement.
- Modern vehicles can lose clock, radio, window, steering, alarm or learned settings after battery disconnection.
- Hybrid and electric vehicles use high-voltage systems. This procedure applies only to the 12-volt battery and only when the vehicle manual permits owner service.
What you need before cleaning
Gather eye protection, chemical-resistant gloves, a small container, water, baking soda, an old toothbrush or battery-terminal brush, clean rags and the correct wrench for the terminal clamps. A terminal-protection spray or a thin layer of battery-terminal grease can help after cleaning.
Use tools that fit the fasteners. A loose wrench can slip and contact body metal. On a conventional vehicle, the battery can deliver very high current through a metal tool. Remove rings, watches and bracelets before starting.
Check the owner’s manual first. Battery location, terminal access, cable order, memory settings and battery-monitoring systems vary by vehicle model and model year. Some vehicles need a battery registration or battery-monitor reset after replacement. Cleaning an existing battery may not require that procedure, but the manual gives the correct instruction for your vehicle.
How to clean battery terminals safely
- Park and shut down the vehicle. Select Park or first gear, apply the parking brake and switch off lights, accessories and ignition. Remove the key or keep the key fob away from the vehicle if the manual calls for that step. Let hot parts cool.
- Inspect the battery before touching the terminals. Look for a cracked case, bulging sides, wet spots, strong sulfur odor, loose posts or heavy corrosion. Do not continue with a leaking, cracked, swollen or frozen battery. Battery acid can burn skin and damage vehicle parts.
- Photograph or label cable positions. Positive and negative cables can look different by color, marking and routing. Use the battery symbols, not cable color alone. Positive is marked with a plus sign. Negative is marked with a minus sign or connects to vehicle ground.
- Disconnect the negative cable first. Loosen the negative clamp with the correct wrench and lift it from the post. Secure it so it cannot spring back into contact. Disconnecting negative first lowers the chance of a short if your tool touches body metal.
- Disconnect the positive cable. Keep the wrench away from body metal and other grounded parts. Some vehicles have more than one cable or a fuse assembly on the positive terminal. Do not force or bend those parts.
- Remove loose corrosion. Brush white, blue or green buildup from the posts, clamps and nearby hold-down parts. Work gently. Do not grind battery posts or remove metal from clamps.
- Apply mild cleaning solution. Mix a small amount of baking soda with water until it forms a thin paste or solution. Dab it on external corrosion with a brush. Fizzing can occur as the alkaline mixture reacts with acidic residue. Use only enough liquid to treat the buildup.
- Keep liquid out of the battery. Do not pour cleaner over the battery. Avoid vent openings, seams, electrical connectors and painted surfaces. Wipe away residue with a damp rag, then dry all parts.
- Clean contact surfaces. Brush the inside of each clamp and the outside of each post until clean metal appears. Stop if a clamp is cracked, stretched or too thin to grip. Replace damaged clamps instead of forcing them tight.
- Check the battery hold-down. The battery should stay secure, but the hold-down should not crush the case. Vibration can damage a loose battery. Excess pressure can damage the battery case.
- Reconnect the positive cable first. Push the clamp fully onto the positive post and tighten it according to the vehicle manual. The clamp should not rotate by hand, but avoid overtightening.
- Reconnect the negative cable. Seat and tighten the negative clamp. Keep both clamps fully engaged with their posts. Do not stack random washers or improvised material under a loose clamp.
- Apply terminal protection. Use a product made for battery terminals after the connection is tight. Keep grease or spray off the contact surfaces between post and clamp. Protection belongs around the connection, not between clean metal contact areas.
- Test the vehicle. Start the engine if the battery and cables appear sound. Check for warning lights, clock or radio resets, power-window behavior and other settings affected by battery loss. A brief warning may clear after normal system checks, but persistent warnings need diagnosis.
Why battery terminals corrode
Corrosion often forms when battery vapors, moisture and metal contact near the terminals. Overcharging, poor ventilation, damaged seals, age and road contamination can increase buildup. A loose clamp can also create heat and resistance, which may worsen starting problems.
White powder usually indicates corrosion around a lead-acid battery connection. Blue or green deposits often involve copper components or copper sulfate. Color alone cannot identify the fault. Corrosion on the terminal may come from the battery, the cable, the environment or a charging problem.
Absorbent glass mat and other sealed lead-acid batteries can still develop terminal corrosion. Sealed does not mean immune to damage or leakage. AGM batteries also have different charging requirements from flooded batteries, so use the battery type specified by the vehicle or charger manual.
When cleaning will not fix the problem
| Symptom | Possible cause | Next check |
|---|---|---|
| Single click or no crank | Weak battery, poor connection, starter fault or ground cable problem | Inspect both terminals and grounds, then test battery state and cranking voltage |
| Slow cranking after cleaning | Low charge, aging battery, high resistance cable or starter issue | Charge and test the battery; inspect cable ends and engine ground |
| Corrosion returns quickly | Battery leakage, charging fault, damaged terminal seal or moisture | Check battery condition and charging voltage with suitable equipment |
| Battery warning light remains on | Alternator, belt, wiring, sensor or battery-management issue | Use vehicle-specific diagnostic steps instead of relying on cleaning |
| Electrical systems reset while driving | Loose connection, failing battery, ground fault or charging failure | Stop driving if power loss affects safety; arrange diagnosis |
A battery tester can show state of charge and starting ability, but test results depend on battery temperature, charge level and tester method. A charger can restore charge without repairing a failing battery. For charger selection, see NOCO GENIUS vs battery tender.
Battery maintenance also differs from battery charging. A maintainer supports a charged battery during storage, while a charger may provide a larger charge. See this guide to battery maintainers for winter car storage for that distinction.
Battery terminal cleaning on hybrids and EVs
Hybrid and electric vehicles often include a conventional 12-volt battery plus a high-voltage traction battery. The 12-volt battery powers control modules, locks, displays and relays. It may sit under the hood, in the cabin or in the cargo area.
Do not open high-voltage battery covers, remove orange cables or attempt traction-battery service during terminal cleaning. Follow the vehicle manual for the 12-volt battery. Some systems can activate after the vehicle appears off, and some models require a specific shutdown sequence.
Model year matters. Battery-monitor sensors, remote functions and electronic parking systems vary by vehicle. If the manual limits owner access, use a qualified technician.
Common mistakes
- Removing positive first. A tool can short positive to body metal. Negative comes off first.
- Pouring water over the battery. Liquid can enter vents, reach electronics or spread corrosive residue.
- Using a metal brush carelessly. A brush can bridge terminals or contact body metal. Control the tool and work with cables disconnected.
- Cleaning without drying. Moisture can support new corrosion and damage nearby connectors.
- Overtightening clamps. Excess force can distort posts, damage clamps or crack parts.
- Applying grease between contact surfaces. Dirt and grease can increase resistance if the clamp does not contact clean metal.
- Assuming corrosion caused every starting issue. A clean terminal cannot restore a worn starter, dead battery or failed alternator.
- Ignoring vehicle memory loss. Battery disconnection may affect security codes, window calibration, steering-angle data or idle learning on some vehicles.
When to get professional help
Get professional help when the battery leaks, swells, cracks, freezes or smells strongly of sulfur. Stop if acid contacts skin or eyes. Flush affected skin or eyes with clean running water and seek medical guidance. Follow local instructions for damaged battery handling and recycling.
Use a technician when cables are burned, insulation is melted, terminals are fused, the battery sits in a hard-to-reach location or the vehicle has a high-voltage system. Professional diagnosis also fits repeated corrosion, charging warnings, unexplained electrical resets and no-start conditions after cleaning.
Ask for a battery, cable, ground and charging-system test rather than only a terminal cleaning. The result separates a dirty connection from a deeper electrical fault.
Gear that can help
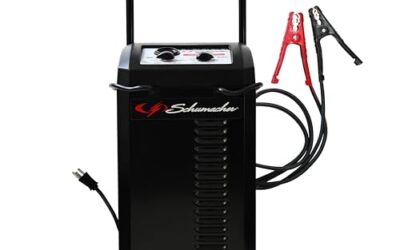
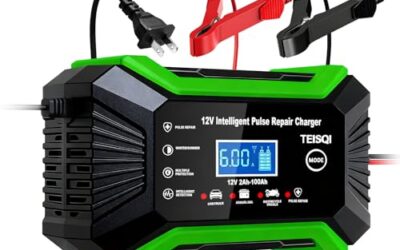
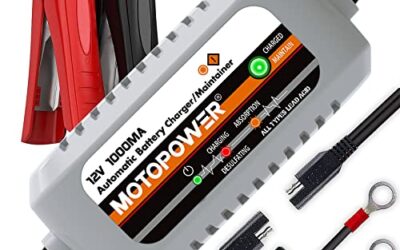
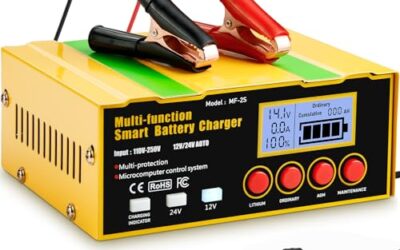
If you need battery chargers and maintainers or battery testers for this job, these picks already appear in our battery chargers and maintainers guides. Check the full guide for fit and who should skip each one.

Pros
- Adjustable charging current supports different charging needs
- Broad compatibility with listed 12V sealed lead-acid battery types
- Includes dedicated desulfation and repair functions
- Offers engine-start assistance and a winter charging mode
- ETL certification is listed in the listing
Cons
- The repair mode cannot repair completely drained batteries
- Only 12V battery applications are specified
Specifications
| Color | 25A |
|---|---|
| Dimensions | 7.68110235437 x 10.0393700685 x 4.9212598375 inches |
| Weight | 5.00008410216 Pounds |
| Product Group | Automotive Parts and Accessories |
| Binding | Electronics |
Best For / Avoid If
Best for buyers prioritizing
- Adjustable charging current supports different charging needs
- Broad compatibility with listed 12V sealed lead-acid battery types
- Includes dedicated desulfation and repair functions
Consider another option if
- The repair mode cannot repair completely drained batteries
- Only 12V battery applications are specified
Pros
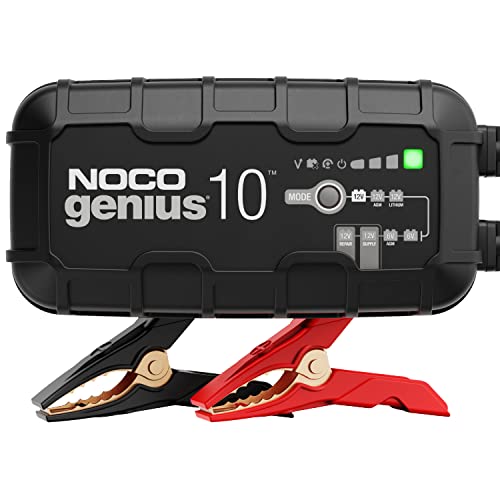
- Supports multiple lead-acid battery types, including AGM, Gel, SLA, VRLA, flooded, maintenance-free, and deep-cycle batteries
- Designed for a wide range of vehicles and equipment, including cars, motorcycles, boats, ATVs, tractors, trucks, SUVs, RVs, and lawn mowers
- Includes both battery clamps and integrated eyelet terminals
- Provides automatic maintenance charging with overcharge protection
Cons
- The listing lists support for LiFePO4 batteries specifically, rather than all lithium-ion battery types
- The charger is specified for 6V and 12V batteries only
Specifications
| Color | Black |
|---|---|
| Size | 10A |
| Dimensions | 4.41 x 4.48 x 9.1 inches |
| Weight | 3.99 Pounds |
| Product Group | Automotive Parts and Accessories |
| Binding | Electronics |
Best For / Avoid If
Best for buyers prioritizing
- Supports multiple lead-acid battery types, including AGM, Gel, SLA, VRLA, flooded, maintenance-free, and deep-cycle batteries
- Designed for a wide range of vehicles and equipment, including cars, motorcycles, boats, ATVs, tractors, trucks, SUVs, RVs, and lawn mowers
- Includes both battery clamps and integrated eyelet terminals
Consider another option if
- The listing lists support for LiFePO4 batteries specifically, rather than all lithium-ion battery types
- The charger is specified for 6V and 12V batteries only

Pros
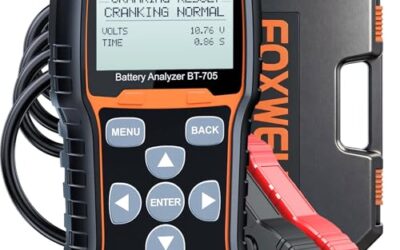
- Combines engine-code scanning with a built-in battery diagnostic feature
- Provides live data and freeze frame information for diagnostic reference
- Does not require batteries and uses plug-and-play operation
- Supports most 1996 and newer US cars and listed 2000 and newer EU and Asian vehicles
Cons
- Does not support new energy or hybrid vehicles
- Limited to engine fault codes and does not support ABS, SRS, or transmission systems
- Vehicle compatibility may vary because the source lists general model-year and protocol support rather than a specific vehicle list
Specifications
| Color | Orange |
|---|---|
| Dimensions | 2.95 x 0.9 x 5.35 inches |
| Weight | 0.4 pounds |
| Product Group | Automotive Parts and Accessories |
Best For / Avoid If
Best for buyers prioritizing
- Combines engine-code scanning with a built-in battery diagnostic feature
- Provides live data and freeze frame information for diagnostic reference
- Does not require batteries and uses plug-and-play operation
Consider another option if
- Does not support new energy or hybrid vehicles
- Limited to engine fault codes and does not support ABS, SRS, or transmission systems
- Vehicle compatibility may vary because the source lists general model-year and protocol support rather than a specific vehicle list
FAQ
Can I clean battery terminals without disconnecting the battery?
Light surface wiping may remove dirt, but full cleaning should use the vehicle maker’s disconnect procedure. Disconnecting negative first reduces short-circuit risk during brush and wrench work.
Can I use vinegar to clean battery corrosion?
Vinegar is acidic and can react with alkaline deposits, but it can also spread liquid and affect nearby metal or finishes. A small baking-soda solution is the common choice for external acid residue. Keep either cleaner away from vents and electronics.
How often should battery terminals be cleaned?
Inspect them during routine service and whenever starting becomes slow or corrosion appears. A fixed interval does not fit every vehicle because climate, battery type, age and charging condition differ.
Should I replace a battery with corroded terminals?
Not always. Light external corrosion may need cleaning. Replace or professionally assess the battery if its case leaks, swells, cracks, freezes or repeatedly causes corrosion.
Will cleaning terminals remove a battery warning light?
It may restore a poor connection, but it does not prove the charging system works. A warning that remains after cleaning needs vehicle-specific testing. Do not treat code clearing as a repair.
Sources and further reading
- Battery Council International (Battery Council International): Learn about lead-acid battery safety, handling and recycling.