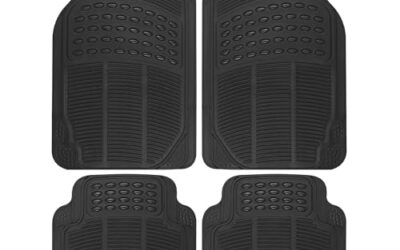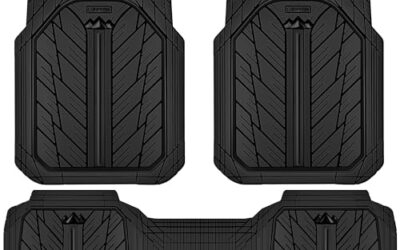

Here is how to clean WeatherTech floor mats: remove them from the vehicle, shake or rinse away loose dirt, scrub with mild soap and water, rinse thoroughly, and let them dry before reinstalling. Check the care instructions for your specific mat first, because WeatherTech makes different styles and materials that may not share the same cleaning guidance.
Key takeaways
- Take the mats out of the vehicle before washing them. This keeps water and loosened dirt away from the carpet and pedals.
- Start with water, mild soap, and a soft or medium-bristle brush. Avoid strong solvents and abrasive tools.
- Rinse away soap and let each mat dry completely before placing it back in the cabin.
- Check that each mat is secured in its intended position and does not interfere with the pedals.
- Use the care instructions for the exact mat if they differ from general cleaning advice.
Before you clean WeatherTech floor mats
First, identify the mat type and look for its care label or model-specific instructions. A molded all-weather liner, a carpet mat, and a cargo liner may use different materials or finishes. Do not assume that a method suitable for one is suitable for every WeatherTech product.
Gather a hose or bucket of clean water, mild dish soap or another gentle cleaner, and a soft or medium-bristle brush. A microfiber cloth can help with a final wipe. If you use a household cleaner, read its label and avoid products containing solvents, bleach, or harsh chemicals unless the mat’s instructions specifically allow them.
Choose a place where rinse water can drain safely. Avoid washing mats where runoff could reach storm drains if local rules prohibit it. If you are cleaning indoors, use a tub or another area that can handle dirty water without soaking nearby carpet or flooring.
Check for loose debris and damage
Shake each mat outside or brush away loose grit before adding water. Sand and small stones can scratch surfaces if you grind them into the mat while scrubbing. Look for cracks, tears, warped areas, or damaged retention points. Cleaning will not repair a mat that no longer lies flat or stays secured.
How to clean WeatherTech floor mats step by step
- Park and remove the mats. Park on a level surface, switch off the vehicle, and remove the mats carefully. If the mat is attached to a factory retention system, release it as intended rather than pulling hard on the fastener. Do not wash mats inside the vehicle.
- Shake off loose dirt. Hold each mat over an area where debris can fall, then shake it gently. Brush off mud, leaves, sand, and crumbs. Removing dry grit first makes the wet cleaning step easier and helps prevent scuffing.
- Rinse with cool or lukewarm water. Use a gentle flow to loosen soil. A garden hose is usually enough for ordinary dirt. Avoid very hot water, steam, or a pressure washer unless the instructions for your particular mat allow them. High heat or force can be unsuitable for some materials and may make control difficult around edges and fasteners.
- Apply a mild soap solution. Mix a small amount of mild soap with water, or follow the directions on a cleaner that is approved for the mat. Apply it to the dirty areas rather than saturating the mat with concentrated cleaner. Do not combine cleaning products.
- Scrub with a soft brush. Work over the surface with light pressure, including channels and raised areas where dirt collects. Use a smaller soft brush for corners and grooves. If a stain remains, repeat the mild wash rather than reaching immediately for a solvent or abrasive pad.
- Rinse until the surface feels clean. Flush away soap and loosened dirt. Residue can leave the mat slippery or attract more grime, so pay attention to grooves and edges. If the water still carries suds, rinse again.
- Dry the mat fully. Shake off excess water and let the mat air-dry in a ventilated place. Wipe remaining droplets with a clean cloth if needed. Do not reinstall a wet mat, and do not place it against a hot heater or other heat source to speed drying.
- Reinstall and check the fit. Return each dry mat to its correct location. Engage its retention points if fitted, and make sure it lies flat without folding or sliding. In the driver area, move the mat only as the vehicle instructions permit, then check that it cannot catch or restrict the accelerator or brake pedal.
Cleaning method by soil type
| What is on the mat | Good first step | Use caution with |
|---|---|---|
| Dry dust, sand, or crumbs | Shake it out, then brush or rinse away the remaining grit. | Scrubbing dry grit hard against the surface. |
| Road mud | Let thick mud loosen with water, then scrub gently with mild soap. | Metal scrapers, stiff wire brushes, or forceful spray at close range. |
| Salt residue | Rinse with clean water and repeat if a film remains. | Leaving salt or soap in grooves and corners. |
| Sticky spills | Blot or lift off excess, then wash with mild soap and water. | Solvents or stain removers that may affect the material. |
| Grease or oily residue | Start with a small amount of mild soap and water, following the mat’s care directions. | Gasoline, brake cleaner, paint thinner, or other strong degreasers. |
This is a cautious starting point, not a substitute for product-specific instructions. If an oily stain remains, check the care guidance before trying a stronger cleaner. An aggressive chemical may damage the surface or leave a residue that is hard to remove.
How often should you wash the mats?
There is no single schedule that suits every driver. Clean the mats when dirt builds up, after muddy or snowy trips, or when spills leave a residue. A quick shake or rinse can handle routine debris, while a soap-and-brush wash is useful when dirt sticks in the grooves.
Drivers who carry wet gear, pets, or work equipment may need to clean their mats more often than someone who drives mainly on dry, paved roads. The useful rule is to remove grit before it accumulates and clean spills before they dry. For cargo-area protection, the cleaning question can also apply to a separate liner; see our guide to trunk mats for wet winter gear.
Common mistakes when cleaning WeatherTech mats
- Using a strong chemical for a routine wash: Harsh cleaners may affect the mat’s material or finish. Start with mild soap and water, and follow the mat’s care directions.
- Scrubbing with an abrasive pad: Steel wool, wire brushes, and rough scouring pads can scratch or wear the surface. A soft or medium-bristle brush is a safer first choice.
- Using very hot water or close-range pressure: Heat and forceful spray can be unsuitable for some mats. A gentle rinse is usually adequate for ordinary dirt.
- Putting the mat back while damp: A wet mat can transfer moisture to the vehicle’s carpet and may feel slick. Give it time to dry fully.
- Adding a shiny dressing: Tire shine, oily protectants, and similar coatings can leave a slippery surface. Do not apply them unless the mat’s instructions specifically approve the product.
- Leaving the mat loose or out of position: A mat that shifts or overlaps another mat can create a hazard in the driver footwell. Use the intended retention points and keep the pedal area clear.
- Using one method for every mat: Materials and construction can vary. A care method for a molded liner may not suit a carpeted mat or another product in the same vehicle.
When to get professional help
For ordinary surface dirt, a careful wash at home is usually a reasonable first step. Stop if a stain does not respond to mild cleaning and the product instructions do not approve a stronger treatment. A professional detailer may be able to assess a stubborn stain, but ask them to use a method suitable for the mat material.
Replace or seek advice about a mat that is cracked, badly warped, torn near a retention point, or unable to stay in place. Cleaning cannot restore its shape or secure fit. If a driver-side mat moves or touches a pedal, remove it from service until the fit issue is resolved. Check the vehicle manual for any instructions about floor mats and retention hardware.
Choosing and maintaining mats for your vehicle
Cleaning is only one part of keeping the footwell protected. A mat needs to fit the vehicle’s floor and stay in place without blocking pedal movement. Model year, trim, and factory floor configuration can affect fit, so a mat for a similar vehicle is not automatically suitable. Our overview of custom-fit car floor mats explains why coverage and vehicle fit matter.
After each wash, check the retention points and the mat’s shape. Keep the driver-side surface free of loose objects, and do not stack an aftermarket mat over another floor mat. If you change vehicles or replace factory hardware, check the vehicle and mat instructions for the correct arrangement.
Next step: How To Clean Under Car Floor Mats.
FAQ
Can I put WeatherTech floor mats in a washing machine?
Do not assume that machine washing is suitable. Mat styles and materials vary, and a washing machine may bend or damage a mat. Follow the care instructions for the exact product; hand washing with mild soap and water is a cautious general method for washable mats.
Can I use a pressure washer on WeatherTech mats?
A gentle hose rinse is a better starting point. A pressure washer can deliver more force than ordinary cleaning needs, particularly close to edges, grooves, and retention features. Use one only if the instructions for your specific mat allow it.
Can I use bleach or household degreaser?
Do not use bleach, solvents, or strong degreasers unless the care instructions specifically approve them. These products may affect the mat or leave residue. Try mild soap and water first.
How do I clean a WeatherTech mat with a lingering odor?
Wash away visible residue with mild soap and water, rinse thoroughly, and let the mat dry completely in a ventilated place. If the odor remains, check the product care instructions before applying deodorizer or another chemical. An odor that returns may come from a spill or moisture elsewhere in the vehicle.
Can I put the mat back while it is still damp?
Wait until it is fully dry. A damp mat can transfer moisture to the carpet and may be slippery underfoot. Check the underside and grooves as well as the visible surface before reinstalling it.