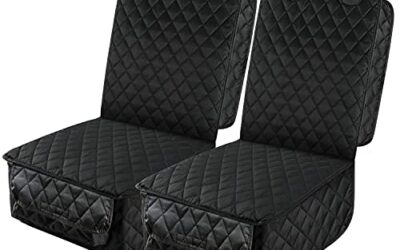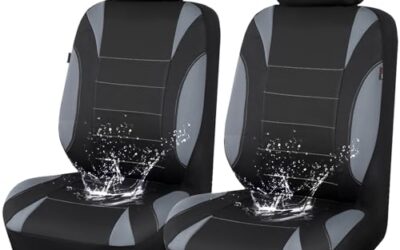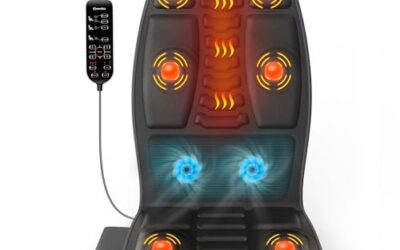

Here is how to replace seat covers in car: identify your seat and its safety features, choose covers that fit that exact configuration, then install them according to their instructions. Many covers slip over the original upholstery, but removing factory upholstery is a different job that can involve airbags, wiring, and specialized trim.
- Check your vehicle’s year, make, model, trim, and seat options before buying covers.
- Use covers made for your seat’s shape and any side airbags or built-in features.
- Install slip-on covers without blocking controls, belts, or airbag deployment areas.
- Do not remove factory upholstery near an airbag unless the vehicle’s service information gives a safe procedure.
What “replacing seat covers” can mean
Replacing seat covers can mean putting aftermarket covers over existing upholstery, or removing the original upholstery and installing replacement upholstery. These jobs are not interchangeable. Most drivers asking how to replace seat covers mean the first job, which usually involves straps, hooks, or elastic fitted around the seat.
Factory upholstery replacement may require removing a seat, releasing trim, and working around wiring or an airbag. The exact layout varies by vehicle and seat. If the original cover is torn, sagging, or damaged, check whether the seat maker or vehicle service information specifies a replacement procedure before taking anything apart.
Before you begin: check fit and safety
Start with the vehicle owner’s manual and the instructions supplied with the covers. A vehicle’s model year, trim, and seat options can change the seat shape and equipment. A cover for a standard front seat may not fit a power seat, a seat with adjustable head restraints, or a rear bench with split-folding sections.
| Check | Why it matters | What to do |
|---|---|---|
| Vehicle and seat fit | Seat shapes and features vary, even within one model line. | Match the cover to the vehicle year, make, model, trim, and seat configuration. |
| Side airbags | A cover that blocks an airbag seam or opening could interfere with deployment. | Use a cover explicitly made for that seat and airbag arrangement. Follow both sets of instructions. |
| Seat controls and sensors | Material or straps can obstruct controls or interfere with a seat feature. | Keep controls, connectors, and sensor areas clear as directed by the vehicle manual. |
| Belts and buckles | A covered or trapped buckle can make the seat belt hard to use. | Keep belt webbing, buckles, and belt anchors accessible and able to move freely. |
| Seat heating or ventilation | Some covers may affect airflow or heat transfer. | Check the cover and vehicle instructions for use with these features. |
Never cut, sew, or alter a cover near a side-airbag area unless the cover maker gives specific instructions for that model of cover. A generic cover is not automatically safe for every seat. If you cannot tell where an airbag exits, stop and ask the vehicle maker or a qualified upholstery professional.
How to replace seat covers in car, step by step
1. Identify each seat and its features
Note which seats need covers and how each one is configured. Check for separate head restraints, armrests, seat pockets, folding sections, power controls, seat belts built into the seat, and heating or ventilation. Photograph the seats before installation so you can compare the finished fit and spot anything that has shifted.
2. Read the cover instructions before fitting
Lay out the pieces and match them to the front seats, rear bench, backs, and head restraints. Cover sets differ in how they attach. One may use straps and buckles, while another may use hooks or a separate piece for a folding seat section. Do not assume that a similar-looking piece fits every seat.
Check the care label, too. Some materials need time to relax after unpacking, and some covers have a specific washing method. Follow the instructions provided for the cover rather than applying a cleaning method meant for the original upholstery.
3. Prepare the cabin
Park on a level surface, turn off the vehicle, and remove loose items from the seats. Move the seats only as needed to reach the attachment points, keeping clear of electrical connectors underneath. If you see exposed wiring, a damaged connector, or an unfamiliar component, do not pull or disconnect it to make the cover easier to install.
Vacuuming the seat first can keep grit from being trapped between the cover and upholstery. If you clean the seat, let it dry as directed by the cleaner and vehicle instructions before fitting a cover.
4. Install one seat at a time
Start with the seat piece identified in the cover instructions. Position it without forcing it over the head restraint, armrest, or side bolster. Smooth the fabric from the center outward so it sits flat. If the cover has separate head-restraint pieces, fit them in the order the instructions show.
Keep any airbag seam, labeled opening, controls, and belt hardware uncovered. Do not tuck material into a gap if doing so would trap wiring, a buckle, or a moving seat part. If the cover seems to require blocking one of these areas, it may be the wrong design for that seat.
5. Attach and tighten the fasteners
Route straps and hooks only through the locations identified by the cover maker. Tighten them enough to limit slipping, but do not pull so hard that the fabric distorts, a strap presses on wiring, or a seat component binds. Do not attach a hook to a wire, airbag connector, or belt component.
On a rear bench, follow the instructions for each split section. Make sure the seat can fold and latch as intended. Do not cover a latch or release handle, and do not let straps bridge moving sections unless the instructions specifically call for that route.
6. Check fit and seat operation
Before driving, sit in each covered seat and check that the fabric stays in place. Move the seat through its normal range using its controls, if equipped. Check that seat belts pull out and retract, buckles click into place, head restraints adjust, and fold-down sections latch. Confirm that no cover or fastener obstructs a control or warning label.
If a seat has an airbag warning label or an airbag indicator comes on after installation, do not treat the cover as the cause without checking. Follow the owner’s manual and arrange qualified diagnosis if a warning remains. Removing a cover does not repair an airbag fault.
Slip-on covers versus factory upholstery replacement
Slip-on covers are usually a cabin accessory fitted over the existing seat. Factory upholstery replacement involves removing the original cover and may require seat disassembly. That work can expose safety equipment and electrical parts, so it is not a simple extension of installing a removable cover.
If your goal is to protect upholstery from spills, pets, or daily wear, a correctly fitted removable cover may meet that need. For related interior protection, see CarTechTalk’s SUV cargo liner guide for dog owners. If the seat itself needs repair, a cover may hide damage without fixing a broken cushion, frame, heater, or airbag system.
Common mistakes
- Buying by appearance alone: A cover that looks close may not fit the seat shape or its features.
- Ignoring side airbags: A generic cover may block an airbag exit area. Use only a cover intended for the applicable seat design.
- Pulling straps too tight: Excess tension can distort the cover or put pressure on parts beneath the seat.
- Trapping a buckle or control: A neat-looking installation is not acceptable if a seat belt or adjustment control cannot work freely.
- Assuming rear seats are one piece: Split-folding benches and separate head restraints need covers that match their layout.
- Removing factory upholstery without service instructions: Seat disassembly can involve safety equipment and wiring that differ by model year and trim.
- Driving before checking movement: A cover may shift when the seat moves or when someone buckles in. Check operation before the vehicle is used.
When to get professional help
Ask a qualified automotive upholstery professional or repair shop for help if you need to remove factory upholstery, if the seat has a side airbag and the cover instructions are unclear, or if wiring or a connector is exposed. Professional help is also sensible when a seat has a built-in belt, damaged upholstery near an airbag seam, a warning light, or a control that stops working after installation.
For an aftermarket cover, contact the cover maker if the fit instructions do not match the seat. Give them the vehicle year, make, model, trim, and the seat features involved. For a vehicle-specific repair procedure, use service information for that exact model year rather than relying on instructions for a similar car.
Readers weighing these picks also look at Best Car Seat Covers for Pet Owners and Best Christmas Car Seat Covers With Universal Fit.
FAQ
Can I install seat covers without removing the seats?
Many slip-on covers are fitted with the seats in the vehicle. The method depends on the cover and seat design. Do not remove a seat just to make installation easier unless the instructions call for it and you can follow the vehicle’s service procedure.
Can seat covers go over side airbags?
Only use covers intended for the seat’s side-airbag arrangement, and follow the cover instructions. Do not cover or alter an airbag exit seam with a generic cover, and seek professional guidance if the correct area is unclear.
How do I know if a cover fits my car?
Match it to the vehicle’s model year, make, model, trim, and seat layout. Check details such as head restraints, armrests, folding sections, seat controls, and built-in belts. A broad “universal” fit description may not account for every feature.
Can seat covers affect heated or ventilated seats?
They can change how heat or airflow reaches the occupant. Whether a particular cover is suitable depends on its material, construction, and the vehicle. Check both manufacturers’ instructions before using those features with a cover installed.
Is replacing factory upholstery a DIY job?
It can be a more involved repair than fitting removable covers. The work may expose airbags, wiring, or seat components, and procedures vary by vehicle. Use exact vehicle service information or have a qualified professional handle it.